WE'VE MOVED

Hello!

Thank you for the amazing 8 years here at A Baked Creation, we can't thank you enough for the memories! But we've decided to move over to a new site - Sincerely, Syl. Please join us there for future posts on all the things you loved here!

Sincerely,
Syl
Showing posts with label Curtis Stone. Show all posts

Thursday, March 12, 2015

Awesome Brownies

With a name like Awesome Brownies, the recipe has to deliver. And I think they do based on two accounts. 
1. I made these and tweeted about it - my coworkers expected brownies in the office the next day. 
2. I made these and packed them up for Howard to bring to work - his coworkers devoured them.

So now there's been a lot of grumbling on both sides. My colleagues are upset that I didn't bring them in and that they went to Howard's colleagues. Howard is now telling me that people are pestering him about when I'll be making more. 

I'm surprised, I thought they would be too rich and that the squares I cut were too big. This is moist, melty, gooey chocolate we're talking about. But the verdict was that the pecans helped lessen the sweetness and added a nice crunchy texture to each bite. 
Awesome Brownies
Recipe adapted from Good Food, Good Life
(Doesn't make enough brownies. Just kidding, makes about 20-24 brownies)

9 ounces of semisweet chocolate (or bittersweet, 61% cocoa or less)
1 stick and 3 tablespoons of unsalted butter
1 1/4 cup of sugar
3 large eggs
1 1/2 teaspoon of vanilla extract
1/4 teaspoon of salt
1 cup of all-purpose flour
1 1/2 cups of chopped pecans

Preheat the oven to 350°F and line a 9 x 9 baking pan with foil. Leave extra foil on the sides to provide as a handle to lift the brownies out when they're finished baking. 
Combine the chocolate a butter over a double boiler to melt. You're only supposed to use 6 ounces of the chocolate and save the rest to mix in after, but I dumped it all in! Let the mixture cool when the butter and chocolate are combined and smooth.
Whisk the sugar, eggs, vanilla, and salt. Whisk in the melted chocolate and butter mixture.
Fold in the flour and then half of the pecans (or 1 cup of pecans if you're following the recipe to a T).
Pour the batter into the lined baking pan (you should spray it with non-stick oil, I forgot) and sprinkle the remaining pecans (and 3 ounces of chocolate if you reserved some instead of melting all of it) on top. Bake the brownies for 28-30 minutes or until a toothpick inserted in the center comes out with just a few moist crumbs attached. Let the brownies cool in the pan.
Using the foil, carefully lift the brownie out from the pan. Use a sharp knife to divide it into squares. Store in an airtight container.

Yummm, just look at that top crust. I think that all brownies should have that shiny crinkle on top. Everything is awesome!
An update: I made them a second time. This time I brought them into my office. =)

Wednesday, March 11, 2015

Almond Falafel

This recipe caught my attention in Curtis Stone's Good Food, Good Life because one - I had all the ingredients on hand and two - I never made falafels before. He notes that falafels are traditionally made with uncooked chickpeas that have been soaked overnight, just until they're partially softened. That's how you get the crunchy texture. But by using canned chickpeas and almonds you can achieve a similar crunch and make falafels on the same day.
Almond Falafel
Recipe from Good Food, Good Life
(Makes about 35-40 falafels)

1/2 onion, chopped
4 garlic cloves
1 tablespoon of ground coriander
1 1/2 teaspoons of ground cumin
1 1/2 teaspoons of salt
1/2 teaspoon of cayenne pepper
2/3 cups of fresh parsley leaves
1/2 cup of fresh cilantro leaves
1 cup of raw whole almonds
2 cups of canned chickpeas
1/3 cup of all-purpose flour
2 tablespoons of toasted sesame seeds
1 1/2 teaspoons of baking powder
Canola oil for deep frying

Have everything out and ready, rinsed and cleaned (canned chickpeas, parsley, and cilantro leaves). Even though it took me a long time to make the first time around, now that I've made it once, it really is quick and easy!
Throw the onion, garlic, ground coriander, ground cumin, salt, cayenne pepper, parsley leaves, cilantro leaves, almonds, and chickpeas into your food processor and pulse until everything is combined. Oh my bejebus, this mixture smells so good in the food processor!
Mix in the flour, sesame seeds, and baking powder. Set up your deep frying station, turn the heat on and as you wait for the oil to reach 350°F, form the falafel mixture into balls with your hands (about 1 and 1/2 tablespoon).
Use tongs or a slotted spoon to gently lower the falafels into the oil to deep fry. I was able to fit six in without the temperature dropping. Keep an eye on your thermometer and fry for 3 to 4 minutes.
They're ready when they're golden brown. Take them out and place on paper towel over a cooling rack. Season with salt.
Tahini Sauce
Recipe from Good Food, Good Life
(Makes about 1 1/3 cups)

1 garlic glove
1/2 cup tahini paste
1/4 cup of fresh cilantro leaves
1/4 cup of fresh parsley leaves
1/4 cup of lemon juice
1/2 cup of cold water
Salt and Pepper to taste

Blend everything in a food processor or mixer! That was easy.
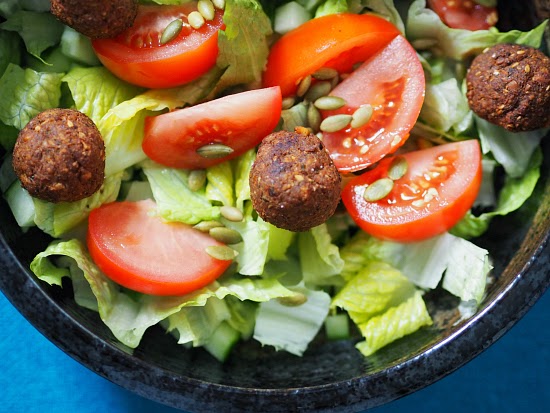
Serve with pitas or tortillas, cabbage or lettuce, tomatoes, cucumbers, and shallots (or if you prefer onions). Make sure you spread in the tahini sauce.
Delicious! I loved pulling the falafel open to see the green colour and heat rise out. Leftovers can be kept in the fridge and warmed up when it's time to eat again. I've only had falafels twice in my life. Once here in Toronto and once in New York City. I think I like these homemade versions better. =)

Best of all, they're really filling and Howard didn't even mind that we were having a meatless dinner!

Tuesday, March 10, 2015

Good Food, Good Life

130 Simple Recipes You'll Love to Make and Eat
Written by Curtis Stone
Photographs by Ray Kachatorian
ISBN 13: 9780449015896
ISBN 10: 0449015890
Hardcover: 304 pages

Sooooo, there's a new Curtis Stone cookbook! I always get excited when I see that there's a new book coming out from him. Usually I find out at sales conference from work and then have to wait an entire year. He once came in to meet with the marketing and publicity department at work and I tried to nonchalantly walk by the boardroom to see if I could spot him or even better - meet him! But no luck, maybe this year!
I'm noticing this trend among a lot of the cookbooks this year, no jacket! And matte interior paper and matte covers with spine wraps. Neutral colours.

Is everyone tired of the glossy and shiny look? I understand that jackets are cumbersome in the kitchen, but they do help protect the book when you accidentally place the book on a wet counter top. Just be extra careful now, you don't want to drop or spill anything by accident to blur out the recipes. But I don't mind this new direction, I'm digging the look. Most cookbooks today are trying to capture a lifestyle compared to the bright and showy cooking shows on television.
Good Food, Good Life is about family and home cooked meals that are humble but tasty. The dedication is made out to Curtis's son, Hudson and the introduction mentions Emerson, the latest addition to his family. You can even make the wedding cupcakes that he made when he married Lindsay Price in the book too. Yes, you can win a girl's heart with food! You can also see that his focus and stories are on raising a family with good food.
Here's a glance at how the cookbook is divided. I mostly tagged recipes for dinner and breakfast. As you can see, I've tagged a lot of them to try. For me, they are mostly weekend recipes because it still takes me awhile to assemble everything, so it's not going to work on a busy weekday for me. I also found that a lot of the recipes I did want to try required firing up a grill, so I had to skip tagging them. A skillet on the stove top might work, but I don't like smoking up my apartment (my exhaust fan in the microwave sucks) and I don't think we're allowed to grill on the balcony. Which is a shame, but maybe I'll take these grill recipes over to my parent's house or borrow a friend's backyard.
Each recipe clearly labels the serving, prep time, cook time, and make-ahead suggestions. I don't know about you, but the prep times are never accurate for me! I'm so slow at getting everything in place before I cook. But I appreciate them just the same, it gives me an estimate (I double it) and I like knowing the cook times so I know when to get up from the couch (stop binge-watching) to make dinner.
If you're someone who fears a long ingredient list like me, I would say that the average would be ten in this cookbook. There are the simpler recipes that use five or less ingredients and then the ambitious projects that list fifteen and over. It really depends on your mood and time.
I wanted to let you a look at a few interior spreads. Most of the recipes include a photograph of the finished products. Others show the ingredients or a picture of Curtis and Hudson prepping and cooking in the kitchen.
The layout is clean and easy to read and the instructions are clear to follow. The photographs look so laid back (even though they're styled) and simple, making the food stand out and really showing you that you can do it, you too can make this dish look good at home. (Why don't my food photos ever look like that?)
Here's Lindsay's Lemonade! I made Lindsay's Guacamole from What's for Dinner? and it's delicious, so I'm expecting the same for this drink.
I have to admit that I prefer What's for Dinner? over Good Food, Good Life a tiny bit, but please keep in mind that the concepts are different between those two cookbooks. I'll be sharing my cooking experience with a few recipes following this post, so return to see how the food turn outs!

And if you ever need a helping hand (sous chef) in the kitchen, you can now get your very own Pocket Curtis! Happy cooking!

Saturday, February 14, 2015

Southwestern Chili

What do you really want this Valentine's Day? A sexy, beautiful homemade treat or a hot and spicy, comforting bowl of chili? I choose comfy any day, in fact, I'm happily wearing sweatpants with fuzzy slippers and sporting a messy hair bun right now. Then, there's the delicious chili I made waiting for me to devour. I've tested this recipe twice so far, so I know it's a winner!
Southwestern Chili
Recipe adapted from Curtis Stone's What's For Dinner?
(Makes about 8 hearty bowls)

A handful of dried chili
8 garlic cloves, peeled
900 milliliters of reduced-sodium beef broth
Salt
2 pounds of lean ground beef
2 1/2 teaspoons of ground cumin
1 1/2 teaspoons of pepper
1/2 teaspoon of cayenne pepper
2 medium white onions, finely chopped
28-ounce can of crushed tomatoes
1 tablespoon of white vinegar
2 19-ounce cans of red kidney beans, drained
Grated cheddar cheese
Chopped Scallions
Fries or tortilla chips

Boil hot water in a small saucepan.

I never actually measured how many dried chili I dump in this. It's roughly a handful or enough to fill a small bowl as seen in the photo above. I cut them in half and remove the seeds as well. There's still a very good spicy kick! If you love putting hot sauce and sriracha on your food, this is a good heat level. You can of course add more or less depending on your comfort zone. After the chili is prepped, put it in the saucepan with the hot water. Leave for 20 minutes so that chili softens. You can use a bowl or plate to place on top to keep the chili's submerged. During this time, peel your garlic cloves and chop your onions.
When the 20 minutes are up, place the beef broth, garlic cloves, chili, salt, and pepper in a blender, chop until everything is well blended. Set aside.
Place your pot or Dutch oven over high heat. Pour in the canola oil, once you see it shimmering, add the ground beef. Cook for 8 minutes, stirring occasionally to scrape the bottom and break up the meat. Add in the cumin, black pepper, and cayenne pepper.
Add the onions and cook for about 10 minutes or until tender. Stir in the chili-garlic-beef-broth sauce, the tomatoes, and the vinegar. Bring to a gentle simmer, uncovered. Reduce the heat to low or medium-low depending on how strong your stove is. Cook for an hour and fifteen minutes, stir occasionally. After half an hour, add in the kidney beans. Chili will thicken, best served hot!
Don't forget to garnish!!! Grate some cheese and chop up some scallions.
Make chili cheese fries by topping the fries with cheese and pour on some chili to melt it. Garnish with scallions.
Gooey goodness. I love melted cheese.

Or, serve with tortilla chips for dipping. Go Tex-Mex by garnishing with cilantro and avocado instead! I don't know what the weather's like where you are, but Toronto is going through a deep freeze, it's currently -17°C and it's supposed to feel like -40°C tonight. So warm up with a hot bowl of chili. This only takes 3 hours - tops - to make!

Saturday, May 11, 2013

Korean Steak Tacos and Guacamole

We're trying to switch from Where should we eat lunch? to What are we making for lunch? these weekends. We found that we ate out for almost every meal starting on Friday night to Sunday evening. And it's not like we were eating lots of unhealthy fried foods, but it was getting expensive! So we're trying to limit our weekend meal allowance, starting to think ahead during the weekdays, shopping for minimal ingredients, and stay cooking at home. At least for lunch, because we do like trying new restaurants with our friends for dinner.
Last Monday, I flagged a recipe in Curtis Stone's new cookbook, What's for Dinner? (I know how this looks as I'm using his recipes for lunch). Korean Steak Tacos. Perfect as we've been trying different Mexican restaurants in the city and still haven't gotten enough of tacos.

Around midnight, I started making the marinade by whisking 1/2 cup of chopped cilantro; 1/4 cup of dark brown sugar; 3 tablespoons of canola oil; 3 tablespoons of soy sauce (I had dark and light soy sauce at home and opted for the light one); 1 tablespoon of sesame oil; 2 garlic cloves, chopped; 1 jalapeño pepper, chopped; 1 teaspoon of freshly grounded black pepper; and 1 teaspoon of coriander powder. Pour out 1/4 of the marinade, cover and refrigerate. Then place the steak in the dish, cover and refrigerate overnight.
Woke up and gave the steak (about 2 pounds and 1.5 inches thick) a flip to the other side. Mmm this marinate smells so good!
While the other side of the steak is soaking, you can prep the veggies for the taco. It's pretty easy, shred some napa cabbage, cut 1 large carrot into matchstick-size strips, and clean some fresh cilantro sprigs.
Don't forget to make guacamole! We used 3 ripe avocados; 1 jalapeño pepper, finely chopped; 1 garlic clove, finely chopped; cilantro; juice from 1 lemon (oops, forgot to pick up lime); and a pinch of sea salt. Mix well!
Remove the steak from the marinade (discard the marinade) and grill for a total of about 5 minutes on each side (for a total of 10 minutes). Transfer the steak to a cutting board and let it sit for 5 minutes.
While the steak is resting, pop your tortillas into the oven for a light toast. Take out the marinade you saved.
Cut the steak into 1/4-inch-thick slices. Pour the reserved marinade over. Assemble the tacos by spreading guacamole on the tortilla, throwing on some cabbages, carrots, and steak. Garnish with cilantro. Or you can fill the tacos with everything and have the guacamole on the side. Up to you!
Enjoy! How do you go about planning weekend meals? Do you plan for the whole week? Play it by ear?

Disclaimer: An ambassador and account manager for Avocados from Mexico contacted us about featuring their products. A #LuvMexAvocado Blogger Pack was sent to us for the campaign. We received recipes featuring avocados from Mexico, a $25 gift card for the purchase of recipe ingredients, and fact sheets about Mexico and avocados from Mexico. We were not required to use the recipes provided or produce a positive feature. All opinions are our own.