WE'VE MOVED

Hello!

Thank you for the amazing 8 years here at A Baked Creation, we can't thank you enough for the memories! But we've decided to move over to a new site - Sincerely, Syl. Please join us there for future posts on all the things you loved here!

Sincerely,
Syl
Showing posts with label caramel. Show all posts

Sunday, January 11, 2015

Caramel Stuffed Snickerdoodles

Happy new year! We hope you all had a wonderful holiday and that the start of 2015 has been a joy as well. Our new year's eve plans consisted of being around great friends, Chinese food takeout, board games, and a cookie exchange. There were delicious caramel and chocolate chip cookies as well as an oatmeal, chocolate, and Skor cookie. We contributed a caramel stuffed snickerdoodles - the name having many confused. Where are the Snickers? What makes them doodles? I had no idea, but a chewy cookie is my favourite kind of cookie.
Caramel Stuffed Snickerdoodles
(Makes about 4 dozen cookies)

2 3/4 cups of all-purpose flour
2 teaspoons of baking powder
1 teaspoon of baking soda
1/4 teaspoon of salt
2 sticks of unsalted butter, at room temperature
1 3/4 cups of granulated sugar
2 tablespoons ground cinnamon
2 large eggs
48 caramels
  1. Sift together the flour, baking powder, baking soda, and salt; set aside. 
  2. In the bowl of an electric mixer fitted with a paddle attachment, beat the butter and 1 1/2 cups of sugar on medium speed until light and fluffy (about 2 minutes)
  3. Add the eggs and beat to combine. Carefully pour in the dry ingredients and beat until mixture is well combined
  4. Take out plastic wrap and wrap the dough. Chill overnight (or one to two hours if you're in a hurry).
  5. Preheat the oven to 400°. Line your baking trays with parchment paper or a silicone baking mat.
  6. In a small bowl, combine the remaining 1/4 cup of sugar with the ground cinnamon.
  7. Use a tablespoon to scoop the dough. Roll into a ball and then flatten to form a disc. Take another scoop of dough and roll into a disc shape. Place a caramel in between the two discs of dough, like a sandwich! Gently fold the edges over so that that top and bottom dough meet. Roll to seal, make sure none of the caramel is sticking out. It should be encased in the middle.
  8. Roll the ball of dough in cinnamon sugar. Place on parchment paper (or silicone mat) on a baking tray. Cookies should be placed two inches apart because they will spread!
  9. Bake for 10 minutes, there might be some minimal cracking on the top of the cookies, but that's' okay!
  10. Immediately transfer to a wire rack to cool, you don't want the cookies to over bake.
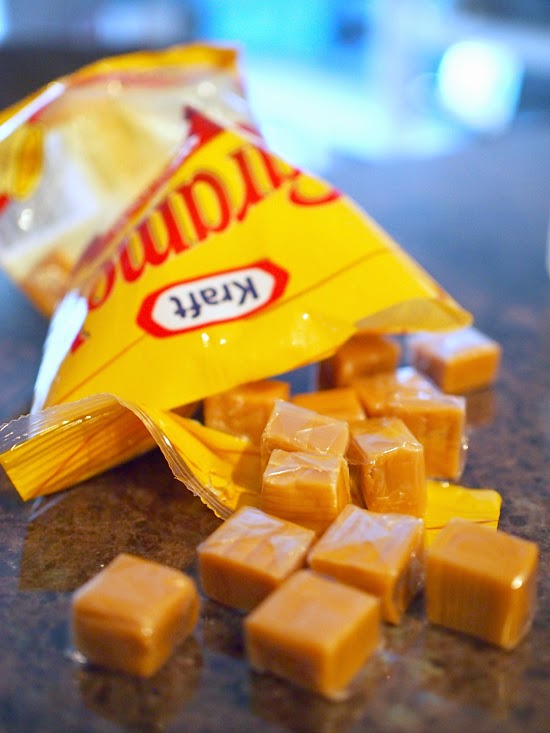
Find caramel squares if possible, they're the perfect size!
Leftover cinnamon sugar is great on peanut butter toast with slices of banana.
Don't forget to give the cookies space to spread in the oven!
I love how these turned out. Little soft puffs. Like cinnamon sugar clouds.
And then there was the gooey, melting caramel in the center . . . good luck just eating one!
Snickerdoodles all packed up and ready for the cookie exchange!

Thursday, August 28, 2014

Praline Caramel Mousse Cake

In collaboration with Canadian Living, I was recently sent a Kenwood Chef Kitchen Machine and gave it a test drive by making a praline caramel mousse cake. What exactly is a "kitchen machine" you might be wondering? It's basically an all-in-one machine for your kitchen. A mixer, whisker, kneader, chopper, slicer, and blender. Yup, it does pretty much everything and you don't need to buy separate appliances such as a hand mixers, food processors, and blenders. Once you have the Chef Kitchen Machine, you can get additional attachments to make pasta or ice cream. But don't let me ramble on as you can find out more information at kenwoodworld.ca. You're here to see how the cake turned out!

There are four components to this Praline Caramel Mousse Cake and I would highly recommend that you work on it over two days. It helps if some of the ingredients get time to cool and chill. Having the right temperatures for everything will keep your cake-making process easier. This is also one of those recipes that go smoothly when you're prepared. Read the instructions a few time and have your Kenwood Chef Kitchen Machine, saucepans, and containers ready. I suggest making the caramel mousse and pralines first and then the genoise cake and whipped cream icing on after.
To make the caramel mousse, you'll need to pour the gelatin and water in a small saucepan over medium heat until it dissolves. Set aside to cool. In a separate saucepan over medium heat, bring the sugar and water to boil until it is amber in colour and smells like amazing caramel. Carefully pour in half a cup of the cream, butter, vanilla, and salt. Stir until it's smooth and thick. Pour ½ cup of the sauce (for decorating the cake) in an airtight container and refrigerate.

Stir in the gelatin mixture into the remaining caramel sauce until it is combined. Let it cool (preferably in the refrigerator) until it's at room temperature.
Using the whisk tool on the Kenwood Chef Kitchen Machine, beat the remaining cream until stiff peaks form. You can tell when the cream is able to hold its shape (see photo above).
Gently fold the cream with the cooled caramel sauce. See above to look at how lovely the caramel gently folds in using the new Kenwood fold tool! If the caramel is too hot, it won't fold into the cream and will even cause the peaks to separate. Cover and refrigerate until firm. Remember, if you ever need tips or guidance, you can turn to Canadian Living's Cooking School. I know it's not every day that we're melting sugar to make caramel!
Next up, let's make the praline. Arrange pecans on a lined rimmed baking sheet. Give them a quick toast in the oven. In the meantime, bring sugar and water to a boil in a small saucepan over medium heat. Always keep careful watch for it can change to amber to black very quickly. Once it is ready, drizzle over toasted pecans.

Let it cool until it hardens and break into small pieces. Attach the food processor to the Kenwood Chef Kitchen Machine and pulse the praline into chunks. Store in airtight container in the fridge.
The genoise cake was the easiest and quickest for me to prep. Melt the butter in a small saucepan and set aside to cool. Using the whisk attachment, beat the eggs and sugar until the mixture triples in volume. Then bean in the vanilla. Sift the flour and salt in three parts and fold into the egg batter. Be gentle and don't over mix or the batter will deflate. Fold in the melted butter until combined and divide among your cake pans.

Bake at 350°F (180°C) for about 25 to 30 minutes and let it cool for 10 minutes before taking the cakes out of the pan. Let the cakes cool to room temperature (also important because if you try to frost it when the cakes are warm, the icing will just melt right off).
To make the whipped cream icing, pour the gelatin and water in a small saucepan and dissolve it over medium heat. Set aside to cool.

The whisk is getting a great workout, beat the cream until soft peaks form. Then beat in the icing sugar and gelatin mixture until stiff peaks form. Set aside to firm up in the fridge.
To assemble the cake, take your first layer and place it on your serving platter, plate, or rotating cake stand. Take the caramel mousse out of the fridge and give it a quick stir. Spread the caramel mousse over the top and sprinkle with some of the praline. Repeat with the remaining cake layers, leaving the top layer bare. Spread the whipped cream icing on top and over the sides of the cake. Sprinkle pralines on top and drizzle with the reserved caramel sauce.

Refrigerate the cake until firm. Then cut, serve, and enjoy!

Disclaimer: This is a sponsored post by Canadian Living and Kenwood. I received compensation for it. There was no requirement to produce a positive review of this recipe. All opinions are our own.

Wednesday, October 10, 2012

Coffee Flan

We're mid-week already! How was your Thanksgiving?

We had a nice long weekend with family and friends. My brother came home from university on the Friday. We went to watch Looper on Sunday afternoon together. That movie was not what we expected! What do you think? Have you seen it? Our mother attempted to bake a turkey. We had salad with chutney sauce - my mom didn't realize it wasn't a salad dressing! The potato wedges she made were delicious though. And thank goodness for the garlic bread. Regardless, I love having dinner with my family and wouldn't trade our meal for anything else!

Saturday, we went out for dinner with Howard's family. Met up with friends for some bubble tea and philosophical conversations. Then we took it easy on Monday. And we ate flan.

I wanted to make my dad a coffee-flavoured flan after he told me how much he enjoyed the first one I made. So here was some guesswork, it isn't perfect yet (mainly the appearance), but the flavours are there!

Coffee Flan
(Makes about 6)

1 3/4 cups of heavy whipping cream
1 cup of whole milk
1/4 teaspoon of salt
1 1/2 tablespoons of ground coffee beans
1 cup + 7 tablespoons of sugar
1/3 cup of water
3 large eggs
2 large egg yolks
  1. Position a rack in the center of the oven and preheat to 375°F. Have six ramekins (or cocottes) ready, make sure they fit in a large metal or glass baking pan (about 13x9x2 inches).
  2. Combine the cream, milk, and salt in a heavy medium saucepan. If you have coffee beans, grind them!  You can use store-bought ones or instant coffee powder (we're guessing). Bring to a simmer over medium heat. Remove and let it steep while you make the caramel.
  3. In another heavy medium saucepan, combine 1 cup of sugar and 1/3 cup of water. Increase heat to high and let it boil - do not stir!
  4. Keep watch as the caramel will go from light to amber to dark to burnt! In about 10 minutes, it should be a nice amber. Remove from heat and immediately pour into the six ramekins. Tilt to coat the bottom entirely. Place ramekins back in baking pan.
  5. Whisk eggs, yolks, and the remaining 7 tablespoons of sugar in a medium bowl. Gradually whisk in the cream mixture, try to avoid creating foam.
  6. Pour the custard through a small sieve. Do it again! We did it twice, but as you can see, a lot of the coffee specks can still be seen. Pour the custard into the ramekins equally.
  7. Carry the baking pan with the ramekins to the oven. Pour warm or hot water into the baking pan so that they reach halfway up the sides of the ramekins.
  8. Bake flans until the center is gently set, about 40 minutes. Carefully take the baking pan out. Remove the water and let the ramekins cool.
  9. Cover and refrigerate for at least two hours, but overnight is best.
  10. To serve, run a sharp knife around the sides of the flan. Place the ramekin in hot water for a few seconds to loosen and melt the caramel at the bottom. This will help the flan slide out smoothly.
Look at the different coloured layers. Most of the coffee that our sieve didn't catch went to the bottom. Then there's the two lighter layers! Interesting. Despite all the coffee beans specks, the flan was still smooth, so you don't really feel a gritty texture.

Last bite!

Monday, July 30, 2012

Vanilla Flan

We celebrated my parent's 30th wedding anniversary this past weekend. There was a whole dinner and slideshow-viewing party with friends and family. There were lots of laughs and great memories. I can't wait for the 35th party!

Thinking that everyone would be too full after dinner, we didn't serve dessert during the slideshow. I know, that is one mistake we won't be repeating. What were we thinking? No dessert? There will be a cake for my parents to slice next time!

Instead, back at home, I made one of my mom and dad's favourite desserts - flan (crème caramel or caramel custard). A reminiscent dessert from their childhood in Hong Kong and Vietnam.

The first time I tasted flan was when my dad's relatives brought over easy-to-make kits from the States. They weren't even from scratch!

I flexed my (non-existence) muscles and cracked my fingers (I actually don't know how to do that). Let's do this. Let's tackle flan. It can't be hard to make!

And you know what? It wasn't! Yes, timing is key and things got dicey when I was trying to pour hot caramel and snap photos or prepare the water bath (bain-marie). But with a few extra hands helping me, I managed to avoid any accidents.

The Perfect Flan
Recipe adapted from Bon Appétit Desserts
(Makes about 6)

1 3/4 cups of heavy whipping cream
1 cup of whole milk
1/4 teaspoon of salt
1 vanilla bean
1 cup + 7 tablespoons of sugar
1/3 cup of water
3 large eggs
2 large egg yolks
  1. Position a rack in the center of the oven and preheat to 375 F. Have six ramekins (or cocottes if you need more) ready, make sure they fit in a large metal or glass baking pan (about 13x9x2 inches).
  2. Combine the cream, milk, and salt in a heavy medium saucepan. Scrape seeds from vanilla bean, add to mixture, and include the scraped bean in the saucepan. Bring to a simmer over medium heat. Remove and let it steep while you make the caramel.
  3. In another heavy medium saucepan, combine 1 cup of sugar and 1/3 cup of water. Increase heat to high and let it boil - do not stir! 
  4. Keep watch as the caramel will go from light to amber to dark to burnt! In about 10 minutes, it should be a nice amber. Remove from heat and immediately pour into the six ramekins. Tilt to coat the bottom entirely. Place ramekins back in baking pan.
  5. Whisk eggs, yolks, and the remaining 7 tablespoons of sugar in a medium bowl. Gradually whisk in the cream mixture, try to avoid creating foam (air bubbles don't create smooth flans!).
  6. Pour the custard through a small sieve into the ramekins equally.
  7. Carry the baking pan with the ramekins to the oven. Pour warm or hot water into the baking pan so that they reach halfway up the sides of the ramekins. Be careful not to spill any into the ramekins!
  8. Bake flans until the center is gently set, about 40 minutes. Carefully take the baking pan out. Remove the water and let the ramekins cool.
  9. Cover and refrigerate for at least two hours, but overnight is best.
  10. To serve, run a sharp knife around the sides of the flan. I tried both flipping it out onto a plate and dipping the bottom of the ramekin in hot water for a few seconds to loosen the caramel. Both methods worked out fine for me!
Mmm, you can see the vanilla beans!

Love the extra caramel sauce that runs out!

Did you ever stop to think that flan and crème brûlée are sort of reversed? Caramelized sugar on the bottom versus caramelized sugar on the top!

My dad has already requested that I make a coffee flavoured flan. True to how he had it as a kid. Stay tuned!

Tuesday, January 17, 2012

Birthday Weekend Lunch

I just wanted to share my birthday weekend treats with you. Howard and I started off being really good! Bright and early, we both went to the gym - step class for me and the elliptical for him. It was such an uncharacteristic January day, sunny and warm, so we went downtown to have lunch at Nadege Patisserie. We've been before to pick up pastries, but we hadn't tried their sandwiches yet!

My favourite of the two was the smoked salmon, cucumber, dill, and cream cheese! A delicious buttery and flaky croissant with the crunch of the cucumber. Smoked salmon and cream cheese, always a winning combination.

We tried their breakfast sandwich which consists of bacon, scrambled eggs, cheddar, and tomato. They heat it up for you so that you're not eating room temperature eggs and bacon.

The first dessert we tried was this green fuzzy-looking cube with the raspberry garnish and cute Japanese decal. Inside, the matcha green tea cake is composed of two layers, the top being raspberry mouse and the bottom being brown rice pudding.

Unable to resist, we tried two more desserts. The salted caramel mousse, which looks like a mouse, was very rich. Breaking it open, we were surprised to see that there are layers in this dessert!

Finally, our favourite of the picks that day, the raspberry tart. Seeds removed and filled with a syrup or jam, the raspberries themselves were a dessert on their own. But, on top of that scrumptious pastry cream, just wonderful!

If you are going to only pick one dessert, I think Nadege's tarts are worth a try. On previous visits, we've had the grapefruit and earl grey tart, a personal favourite of mine, and the mango coconut tart. They all have a great balance of sweet and sour.

PS: Took the photos on my iPhone. I need to remember to bring my camera out more often!

Sunday, July 17, 2011

The Designer Cookie


The Designer Cookie
292 Eglinton Avenue West
Toronto, ON M4R 1B2
(416) 619-1197

The next place we went to was the Designer Cookie! Despite the name of the shop, they do have cupcakes here. Howard and I weren't sure why the gigantic sign was covering the menu, but at least we were given a rundown of all the cupcake flavours.

They have regular sized cupcakes and mini ones - always, always pick mini if you want to sample more flavours!

Here were all the available flavours that Saturday - from top to bottom, left to right: banana caramel, Oreo, crème brûlée, cinnamon, chocolate, and red velvet.

My favourite one? Probably the crème brûlée! While it was really sweet, I liked the crunch of the toppings.

Thursday, August 26, 2010

Spot Dessert Bar


Gossip Girl: Spotted. S in the East Village swooning over cupcakes. H looks tired from all the walking. Say, weren't they heading for lunch?


Spot Dessert Bar
13 Saint Marks Place
New York, NY 10003
(212) 677-5670

They are on facebook and twitter too!


This was one of my other favourite stops during our trip to New York, the other being Baked. Here are my reasons. Baked is fantastic for updated classic American desserts. We tried delicious cupcakes, whoopie pies, and brownies there.

Spot Dessert Bar has American desserts with an Asian fusion. Something I have been thinking about for the past year. Why we do not have any place like that here in Toronto baffles me. We need a dessert bar!


We arrived at Spot around lunch time so it was still relatively quiet, with this in mind, customer service was friendly and very helpful.

My first impression on the cupcakes was, the frosting is really glossy! I had to wonder if edible glitter was used, but I think that it was just the lighting.


Let's have a closer look at those cupcakes! From left to right in colours: brown top - Vanilla Caramel Vietnamese Coffee, brown bottom - Mocha Maldon Salt Caramel, white middle - Vanilla Coconut Almond, green - Chocolate Green Tea Fruit Jam, white right - Vanilla Yuzu Lemon, pink - Berry Berry Chocolate.


I chose the Vanilla Caramel Vietnamese Coffee cupcake for a pick-me-upper!


Originally, this was for take-out because we were on our way to lunch. But look how inviting the place is! So, we took a seat. We really liked the decor of this place, it was clean, natural, and comfortable.


I still think the frosting is shiny, but yum! Look at the caramel bits and the coffee topping.


The caramel provided a nice crunch to the cupcake.


Surprise! The cupcake was labeled as caramel not because of the tiny crunches on top, but because there was a filling too!

Delicious! The frosting was smooth and silky, the cupcake was nice and moist. The caramel and Vietnamese coffee went really well together. Sigh... do we have to leave and go for lunch? Yes, lunch beckons the boys and we had one more stop along the way...

Until next time Spot Dessert Bar! =)

Tuesday, August 24, 2010

Little Cupcake Lover

This is why I like New York City. I can be walking around, turn a corner, and find cupcakes. It happened to me twice on this trip. I happened to stumble on something new, something I hadn't heard of before, and didn't set out looking for.


Little Cupcake Lover
Soho on Broadway between Houston and Bleecker


May I present to you, a cupcake cart! I've tried the cupcake truck (the Cupcake Stop) last year and now another experience! Howard wasn't brave enough to try food from any street vendors. I get the brave medal for this trip. =)


The front view of the cupcake cart. The top shelf contains all the mini cupcakes and the bottom one showcases all the regular cupcakes.


It was before 11am, but that didn't stop me from getting a mini cupcake. I was about to pick the Nutella mint but noticed that this one wasn't listed on their menu - so why not pick something that isn't there all the time? Banana caramel it is!


A nice quick bite! Bananas are still in the "breakfast" time zone right?