WE'VE MOVED

Hello!

Thank you for the amazing 8 years here at A Baked Creation, we can't thank you enough for the memories! But we've decided to move over to a new site - Sincerely, Syl. Please join us there for future posts on all the things you loved here!

Sincerely,
Syl
Showing posts with label peanut butter. Show all posts

Friday, October 18, 2013

Butter Baked Goods

Today is Chocolate Cupcake Day. Yes, it's a thing. Chocolate cupcakes are our favourite, they're easy to make, stay moist, and you can pair it with almost any flavours and it still tastes great. Or, you can add a hint of salt with it if you want to cut the sweetness. Basically, we find that chocolate is versatile (we're sure others agree)! To help us celebrate this national holiday, we enlisted the help of Butter Baked Goods.

Butter Baked Goods
Nostalgic Recipes From a Little Neighborhood Bakery
Written by Rosie Daykin
Photographs by Janis Nicolay
ISBN 13: 9780449015834
ISBN 10: 0449015831
Publisher: Appetite by Random House
Hardcover: 272 pages

Butter is a bakery in Vancouver, opened by Rosie Daykin (an interior designer), in 2007. Her vision was to restore the nostalgia of homemade baked goods. We think she succeeded from viewing photos of the bakery online and flipping through her cookbook. Pastel pinks, greens, and blues, Butter Baked Goods is like a chic grandmother. The cover alone gives me cake stand envy. That rose wallpaper you see in the background? Endpapers. And there's a soft green ribbon that serves as a bookmark, which I know that they use to tie up their treats with.
There's nine chapters of treats: muffins, scones, cinny buns and loaves; drop and sandwich cookies; rolled and cut cookies; bars and slices; butter creams and frostings; cakes; cupcakes and whoopie pies; pastry, pies and tarts; and confections. The recipes go by measuring cups and spoons, so the only thing I would wish for would be the weight measurements beside the ingredient list.
Recipes I'll want to try: Pineapple Coconut Scones; Apple Bacon Cheddar Scones; Banana Chocolate Loaf; The Gingerstamp; Smartie Pants Bar; The Campfire Bar (makes me want to go out and purchase a better kitchen blowtorch); Butterscotch Crispy Bar; Triple Lemon Layer Cake; The Quintessential Butter Tart; and Butter's Famous Marshmallows.
I also want to give a nod to Janis Nicolay and Kelly Hill. The photographs are lovely, delicious looking and the layout and design is beautiful and thoughtful. There's a photo for every recipe and even some for process and procedures. Overall, this would be a great gift for those starting out in the baking world.

So I made some chocolate and peanut butter cupcakes, only making slight changes here and there to make due with what I had in the kitchen. They might look different from the version in the cookbook, but we can attest to how yummy the cupcake itself is!
Chocolate Peanut Butter Crunch Cupcakes
Recipe adapted from Butter Baked Goods
(Makes about 28-30 cupcakes)

2 1/2 cups of all-purpose flour
1 1/4 cup of cocoa powder
1 1/2 teaspoon of baking soda
1/2 teaspoon of salt
1/2 cup of smooth peanut butter (plus 1/2 cup more if you include the optional step)
1/2 cup of unsalted butter, room temperature
1 cup of granulated sugar
1 cup of dark brown sugar
3 large eggs
1 1/2 cup of whole milk
1 cup of sour cream
2 teaspoons of vanilla extract
  1. Preheat your oven to 175°C (350°F) and prepare your cupcake pans by placing the cupcake liners in.
  2. Sift the flour, cocoa powder, baking soda, and salt into a large bowl (preferably one with a spout).
  3. Using a stand mixer with the paddle attachment, cream the peanut butter, unsalted butter, granulated sugar, and brown sugar on medium to high speed until light and fluffy.
  4. Add the eggs one at a time, mixing well after each one. Scrape the sides of the bowls as needed.
  5. In a measuring cup, whisk the milk, sour cream, and vanilla extract together.
  6. Turn the mixer to low and alternate adding the dry ingredients and the liquid ingredients. Begin and end with the dry ingredients in three parts, the liquid ingredients in two parts.
  7. Using an ice cream scoop, fill each cupcake liner about three-quarters full. This part is optional (I skipped it), use a small teaspoon to push in 1 teaspoon of peanut butter into the center of the batter. Make sure it is fully covered by the cupcake batter.
  8. Bake for 20-25 minutes or until a cake tester inserted, comes out clean. If you included the optional step, don't insert your tester into the middle, do it on the side. Otherwise, you'll just hit warm, gooey peanut butter.
  9. Remove the cupcakes from the oven and allow it to cool in the pan for 10 minutes before transferring them to a wire rack.
The following recipes are not in Butter Baked Goods, but an improvised version since the original called for a peanut butter butter cream and a deep dark chocolate butter cream. I didn't feel like doing a double stacked swirl of frosting on the cupcakes.

Chocolate Peanut Butter Frosting
(Makes enough to frost 18-20 cupcakes)

1 stick of unsalted butter, at room temperature
2 cups of icing sugar
1/4 cup of smooth peanut butter
5 (approximately 1/4 cup) Lindor Peanut Butter Milk Chocolate Truffles, melted
1 1/2 tablespoons of whole milk
  1. Using a stand mixer with the paddle attachment, cream the butter, icing sugar, and peanut butter together.
  2. Melt the chocolate and peanut butter truffles over a double boiler or in the microwave at 10-15 second intervals. Pour into frosting and mix.
  3. Add in the milk for a smoother consistency.
Chocolate Ganache
1/4 cup of semi-sweet chocolate
1 tablespoon of whole milk
  1. Melt the chocolate over a double boiler or in the microwave at 10-15 second intervals. Stir until smooth.
  2. Add in the milk and mix until incorporated.
Crunch
1/2 cup of Rice Krispies

Final steps to assemble the cupcakes. Pipe the chocolate peanut butter frosting onto the cupcake, swirls look best! Then, create the chocolate ganache as you want to work quickly with it so that it doesn't cool and harden. Pipe zig-zags of chocolate ganache over the chocolate peanut butter frosting. Sprinkle Rice Krispies liberally over the frosting.
Eat! Howard's colleagues had the joy of eating some of our Chocolate Cupcake Day treats. I heard everyone from his department ate two and left only 10 for lucky passersby.

Thursday, September 27, 2012

Chocolate and Peanut Butter Pots de Crème

Last weekend, we were invited to a dinner party (in which the hosts didn't have to do any of the cooking - now that's my kind of magical, we'll leave you to figure it out) and we called dibs on bringing dessert. We always try not to show up empty handed!

So some ideas were milling about, we really wanted to do something with our jars again, since they would be perfect individual portions and easy to bring over to their house. No amount of rocking will smudge or ruin these desserts. Our hosts like the chocolate and peanut butter combination, so we were thinking of chocolate pots de crème and adding some peanut butter element into it.

During the week, we happened upon the blog, Tar-Tryin', where Emily blogs through the Tartine cookbook. An amazing feat no doubt, but it was a sign. She's made the chocolate pots de crème recipe from the book! Next thing you know, we're pulling out our Tartine cookbook off the shelf and going on a grocery trip.

Minor variations in our recipe - just a swap of chocolate type. We melted 5 ounces of semisweet chocolate and 1 ounce of REESE'S Minis over a double boiler. Next, we combined 2 3/4 cups of heavy cream, 3 tablespoons of sugar, and 1/8 teaspoon of salt in a sauce pan and whisked until it was blended. Once it started to boil, we took it off the heat and whisked in the chocolate.

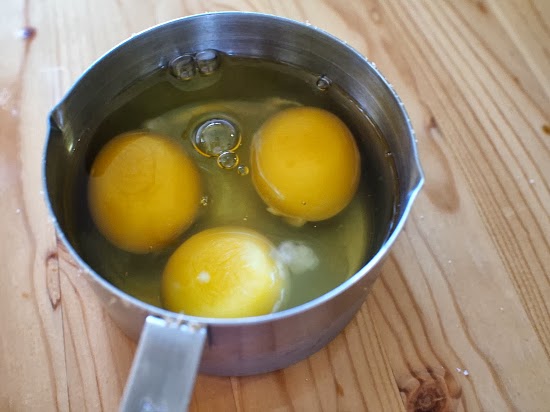
We preheated the oven to 175°C (350°F). Now, using our stand mixer, we whisked 8 large egg yolks until combined (save the egg whites - you'll need them for our next post). Then slowly poured in the chocolate mixture as the machine continued to whisk. Once it was all blended together, poured the mixture through a fine sieve into a container with a spout.

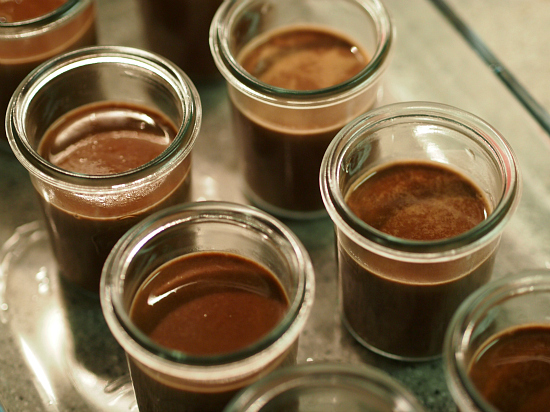
Next, we divided the chocolate mixture among 8 oven-proof jars. Placed them in an oven-proof pan and popped it into our oven. Using a kettle or container with a spout, we poured water into the pan so that it came up 3/4 of the way up the sides of the jars.

Baked for about 20-25 minutes. The sides and top were set, but the middle of the crème was still jiggly.

We carefully removed our jars from the oven. If you can carry the whole water bath out - we give you thumbs up! We were cautious and took the jars out individually (chicken!), since we couldn't guarantee that we would carry it out without any hot water sloshing onto the floor!

While the chocolate pots de crème are cooling, we worked on garnishing. From our bag of leftover REESE'S Minis, we quartered each piece. There's something fun about chopping up peanut butter cups....

Once our desserts are completely cooled, we garnished the top with the chopped peanut butter cups and added some Callebaut Crispearls for a crunchy texture. Or, whatever chocolate and peanut butter goodness you like!

Mmm, can't wait to dig in!

Now, to store them for safe travels. If you have seals and lids for your jars, put them on!

Clamp them down!

Ready to go! They're very cute in presentation and great for placing out in a potluck or buffet style dinner party. Just place a spoon on the top of the jar and guests can grab one whenever they feel like it.

First bite, managed to get two out of three! No Crispearls here, but the top crust of the crème will provide texture.


Thursday, September 20, 2012

Georgetown Cupcakes

This was a must visit for me while we were in New York! I'm actually quite happy that there's now a good cupcake place to visit while shopping in SoHo.

Georgetown Cupcakes! Their first New York location and I'm secretly pleased I don't have to travel all the way to DC to try them.

That's right. If they sound familiar to you, it's because you've probably seen them on TLC. Sisters Katherine  and Sophie are forever baking, decorating, and coming up with wacky ideas for their clients.

No surprise here, there's a line up for their cupcakes. I feel a little envious of those walking out with large paper bags filled with pink bakery boxes. If only I could bring all these cupcakes back to Toronto!

We're in line now! Can't wait to get close to that display case. We know the menu's right beside us on the wall, but it's more fun to see what the flavours look like.

The shine on that chocolate makes me giddy with joy. You're looking at their classic madagascar bourbon vanilla cupcake with a whipped Callebaut chocolate frosting topped with a fondant flower.

On the left, Chocolate³ which means a Valrhona chocolate cupcake with Callebaut chocolate ganache icing topped with french chocolate sprinkles! To it's right, the Chocolate Ganache is a Valrhona chocolate cupcake with a thin layer of Callebaut chocolate ganache icing topped with a blue fondant flower.

We've found a flavour that Howard likes most - something citrus! This is their fresh key lime cupcake with a key lime frosting topped with a candied lime.

A common favourite for most people, the classic red velvet cupcake with a vanilla cream cheese frosting topped with a red fondant heart.

Which one do you prefer? Chocolate and vanilla or vanilla and chocolate? I can't decide!

Seeing some fall flavours already! The pumpkin spice cupcake has a maple-infused cream cheese frosting topped with a fondant maple leaf.

Chocolate pb swirl is a Valrhona chocolate cupcake with a creamy peanut butter core topped with a rich Callebaut chocolate ganache icing and a peanut butter swirl.

Chocolate Banana is a Valrhona chocolate and fresh banana cupcake with a banana frosting topped with a yellow fondant flower.

Look at that sparkly pink mixer!

Despite the long line up, service was friendly and fast, keeping the order and pick-up lines moving along. We received the best news at the cashier. In celebrating Fashion's Night Out, every customer got one free cupcake. Since there were two of us, we got two free cupcakes!!!

Whatttt! We didn't have to pay for the cupcakes? We got to try Georgetown Cupcakes for free? Incredible! Thank you to whoever thought of that fantastic promotion!

There's a little handy utensil bar if you needed any for your cupcakes and drinks.

We were lucky enough to grab a spot near the front of the bakery. The flowers are such a nice touch!

So what did we get? You already know Howard's pick . . .

I was really appreciative of the care they took in boxing up the cupcakes and making the little divider so that the flavours wouldn't crash together.

The key lime cupcake was light and fluffy, the frosting was pretty good - you can see the zest in it. The frosting is also very smooth and isn't too dense. Overall, thumbs up!

I ordered one of the seasonal cupcakes for the month of September (the other is a Caramel Apple, which I would have also loved to try). The Bananas Foster cupcake! I think I still have New Orleans in my mind. This is a rum-infused caramel cupcake baked with carmelized bananas, topped with a caramel buttercream frosting, a caramel drizzle, and a fondant flower. Delicious!

Tuesday, February 21, 2012

Crispy Chocolate Tarts

Yesterday, I was laying in bed and thinking about tarts. When will I start making tart shells? Are tart shells hard to make? What if I used something else for the shell? Something like... rice krispies!

Using the same recipe from the peanut butter crispy bars, I woke up, had a bowl of cereal, and got to work. 

Make the base of the tart in your pans first. When that is all even on the bottom, start building the sides. Press and mold the rice krispies with your hands and then put them in the fridge to firm up - about an hour.
You could fill the rice krispies tarts with any filling of your choice, I went for a peanut butter and chocolate layer. Just the one! Pour it in the shell and let it set in the fridge for another hour.

Without any doubt, this was one very sweet tart, we might try a citrus filling next time. =P

Saturday, October 1, 2011

Sweet Revenge

The first dessert place Howard and I tried in New York this year was Sweet Revenge. It is kind of crazy how many great places there are to eat around Carmine Street and Bleeker Street. I picked it because their cupcake menu has some great flavour parings that I wanted to try.

62 Carmine Street
New York, NY 10014
(212) 242-2240

We're here! It's such a homey place even if the word "revenge" is in the name. I love the wooden frames and the giant open windows.

Service was nice and friendly. Do you see the bakery display case?

Here's a closer look! It's interesting that they present their cupcakes in a different way. With so many cupcake shops in New York, I thought it was smart of them to use a non-traditional cupcake liner and show off their frosting in a unique way.

Remember how I said there were other places close by that we wanted to try? We had initially said we'd try one cupcake, but then Howard went and ordered another! He got one of the signature cupcakes - the Sweet Revenge - a peanut butter cupcake with ganache filling, topped with peanut butter fudge frosting.

I had come for the Bird of Paradise – a lime chiffon cake with mango buttercream topped with fresh lime zest, but it wasn't available that day. So I went with the Very Strawberry – a Mexican vanilla cupcake with strawberries and topped with a strawberry cream cheese frosting.

Oops, we took Domo out when we finished our cupcakes - sorry!

Friday, March 11, 2011

Reese Minis Giveaway Winner

Hello there! I'm here to announce the winner of the Reese Minis Giveaway. When I was tweeting about this contest, a few of you responded to the question on twitter. So I counted those as entries too (being nice). However, random.org came up with the number 18, so the winner is...

Amanda! Congratulations, you will be receiving some yummy Reese Minis soon (check your inbox for an e-mail from us).

May we suggest these peanut butter chocolate cupcakes? =)

We also recommend the ones that Naomi from Bakers Royale made (looks exactly like what you're looking for), Jessica from How Sweet It Is made, or the ones Michelle from Brown Eyed Baker made. Decisions, decisions!

Saturday, March 5, 2011

Chocolate Peanut Butter and Banana Bars


Something neat arrived in an intermodal container this week. (Yes, I had to look up "intermodal container" in order to know what to call them. Learned something new!) The container was marked as private with a Max Gross of 32.500 kgs (71.650 lbs). I don't think I can lift that...


It told me to reveal, so I carefully tugged at the Velcro strip and pulled out Reese Minis!


Tumble out little Minis! Warning: these are dangerous to have around because they are miniature versions of the Peanut Butter Cups and are unwrapped. You'll eat four or five and think nothing of it, but soon the whole bag is devoured!

I was sharing the cool packaging on twitter when Sarah from What Smells So Good? tweeted this:


Done! We're making those! (Click on the image above to see the recipe.) When I told Howard what we were making, he said, "what? We have to bake with it?" Yes. It became a challenge to NOT eat them as they are.

See me covering the black bottom here with more banana batter:


Then scoring out 16 bars with Reese Minis in the center:


Hey, what smells so good?


These bars! Only 2 Reese Minis high, hehee!


Before I ate every last crumb, I noticed this one:

Still showing the black bottom and top layer. =)

So readers, if you were given some Reese Minis, what would you make? Enter our Reese Minis Giveaway:
  1. Please tell us what you would do with Reese Minis? Do you prefer them as they are? Or do you want to dress up a dessert or baked good? Maybe something savory? Leave your creative responses in the comments below.
  2. Don't forget to leave me an e-mail address!
  3. The Reese Minis Giveaway is open on March 5th 2011 until March 10th 2011. So you have plenty of time to enter! Comments submitted after 12 midnight EST on March 10th will not be considered.
  4. The giveaway is only open to those with a Canadian mailing address, sorry folks!
  5. A lucky winner will be randomly drawn.
  6. The winner will be announced on March 11th on our blog.
Disclaimer: Thank you to Brittany from M Booth & Associates and those at Hershey's Canada for sending us a sample of Reese Minis and for providing the giveaway.