WE'VE MOVED

Hello!

Thank you for the amazing 8 years here at A Baked Creation, we can't thank you enough for the memories! But we've decided to move over to a new site - Sincerely, Syl. Please join us there for future posts on all the things you loved here!

Sincerely,
Syl

Friday, July 22, 2016

Roasted Peach and Graham Cracker Crunch Ice Cream

Oh my peaches, what a scorcher we're having here in Toronto. But guess what? No complaints because I complain enough during the icy cold winters we have. I am embracing the hot weather with open arms (because it keeps me cool) and eating lots and lots of ice cream.
It's currently peach season (yay) and I don't even know if I had to roast these, but I was inspired after seeing How Sweet It Is's post here. The peaches were sweet enough on their own, so I felt that roasting them might have made them a tad sour. But I gave it a try anyways. Mixing in 4 tablespoons of brown sugar and 1/2 teaspoon of salt before laying them out on a baking tray and roasting for half an hour.

But you know what I did love from that recipe? The graham cracker crumble! I need to make this for every ice cream topping! Simply mix 1 cup of graham cracker crumbs with 6 tablespoons of unsalted butter. It'll become nice and chunky, giving you a good crunchy texture in the ice cream.

I didn't follow the recipe fully as I switched to use Jeni's Splendid Ice Cream's base. So there was churning and freezing involved, which means I did not get to taste the fruit of my labours until the next day.

I sprinkled the graham cracker crumble, tossed in some peaches, then poured the ice cream base over. Repeated again with another layer of graham cracker crumble, peaches, and ice cream. Ending with the crumble and peaches on top.
Noticed my new ice cream container? Yes, I thought purchasing one would be a good investment for all the ice cream I'm going to make in the future. I found it at Crate & Barrel, Williams-Sonoma also carried one with a white rim instead of red. Howard firmly made me get the red one from Crate & Barrel because it was cheaper. Hmph! Aesthetically I preferred the all-white Tovolo storage tub, but financially, it just didn't make sense. The packaging does say that it's dishwasher safe, but I found that there was a bit of warping and well, you see the freezer burn on my peaches. Going to hand wash this from now on. The tub also doesn't hold a lot, if I hadn't accidentally spilled some of my ice cream mixture when I was pouring it into the ice cream machine, this would have overflowed in the tub because of the extra goodies I added in.
I wish I could say that the combination was perfect, but the texture of the ice cream came out icy. Noooooo! I wonder if it was all the delicious peach juices that came out after I roasted it? The ice cream is particularly more icy there, but it's fine around the graham cracker crumble. I'm starting to understand why the cookbook mixes jam into the recipe instead of actual fruit. Ah, we live and learn, but I'm still eating it and shivering along the way as it's keeping my body temperature down this summer.

Monday, July 18, 2016

Blog Tour: Stars So Sweet by Tara Dairman

Hello, Monday!

Yes, I can feel chipper at the start of the week because I'm taking part of something fun today - the Stars So Sweet blog tour! This middle-grade book releases tomorrow and if you've read the first two books, All Four Stars and The Stars of Summer, then you'll want to know how it all pans out for Gladys Gatsby.

And before we dip in, I just want to say that sometimes it's completely okay to judge a book by its cover because there will be certain aspects in it that just scream out to you. Bunting? Check. Macarons? Check. Madeleines? Check. Cupcakes? Check. Even a cake stand? Yup. I'm pretty sure ten-year-old Sylvia would have picked up this final book in the All Four Stars trilogy. Kids these days are so lucky that there are so many great books for them to choose from. Each geared to their own interests. That's why shows like MasterChef Junior exist, right?

Stars So Sweet
Written by Tara Dairman
Hardcover | 288 pages | Ages 8-12
ISBN 978-1-10199-648-5

Picking up from the second book, summer is winding down and Gladys Gatsby has to prepare for the next big step in her life - middle school. Will she be able to juggle classes, homework, after-school activities, and critiquing restaurants for the New York Standard? What's going on with her and Hamilton Herbertson? Why is the school newspaper reporter on her tail? At least she still has Sandy, Parm, and Charissa by her side . . . right? Her parents have limited her time in the kitchen again and then, to her complete surprise, Aunt Lydia shows up on their door step too.

What do you think? Enough for any twelve-year-old to handle as they enter a busy fall? Probably more than anyone can handle calmly, but Gladys Gatsby does it with grace and help from her friends and advice from few exceptional adults. Not only is she problem solving her own dilemmas, but she has time to organize bake sales at school to help out the after-school programs.

What I love about these books is that there's no magic miracle that comes to the rescue, every issue is figured out in a timely basis and completely plausible. Things don't just fall in place for the perfect happy ending, the characters have to try and try again. Take Sandy's challenge at earning his reputation at school. Or the fact that friendships need to take time to build - Parm and Charissa didn't start out on good terms at first, but given the chance and their friendship to Gladys, they slowly learn to accept each other.

Of course the main feature that I admire in Tara Dairman's writing is how funny the situations can become and Gladys practical commentary has me in stitches. And the food writing - spot on for any aspiring foodie. It's in the chapter titles, it's in Gladys' restaurant reviews, and in her daily metaphors and similes. Really, I give this series all four stars!
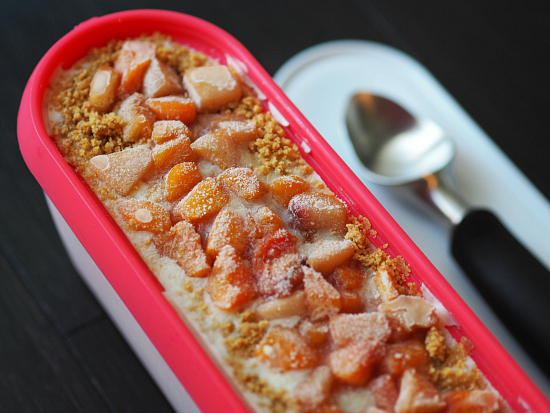
In honour of the scrumptious finale of the series, I baked up some savoury madeleines as a nod to Gladys love for French baked goods.

Cheddar and Scallion Madeleines
(Makes a dozen)

1/2 stick of salted butter
3/4 cups of all-purpose flour
2 teaspoons of baking powder
1/4 teaspoon of salt
1/4 teaspoon ground black pepper
3 tablespoons of extra-virgin olive oil
2 large eggs, room temperature
3 tablespoons of milk
1/3 cup of grated smoked cheddar (I'm sure regular cheddar will work too)
2 tablespoons of finely chopped scallions
  1. Preheat your oven to 350°F (175°C). Brush melted butter on your madeleine pans or use a cooking spray.
  2. Place the butter and oil in a microwavable glass bowl or measuring cup. Microwave on low until butter has melted. Whisk to combine and let it cool for 3 to 4 minutes.
  3. Add eggs, one at a time, and whisk until completely blended.
  4. Add milk and whisk for 1 to 2 minutes.
  5. Stir in the cheese and scallions.
  6. Add the flour, baking powder, salt, and pepper and whisk until the batter is fully combined.
  7. Using a spoon, scoop, or teaspoon, fill the molds on the madeleine pan with the batter. Don't fill it completely, leave a sliver of space so that the madeleine can expand while baking.
  8. Bake for 9 to 11 minutes or until the madeleines pull up and the edges are golden brown.
  9. Remove the pan from the oven and let it cool for 2 to 3 minutes. Use a small fork or spatula to remove the madeleines from the pan.
  10. Enjoy!
Just so you know, when these are baking in the oven, your kitchen will smell delicious. Howard was in the den yelling, "I smell bacon!! Give me bacon!" while I was yelling back, "I'm not making bacon!!!"
Tara Dairman is the author of the middle-grade foodie novel All Four Stars (Putnam/Penguin) which was named an Amazon Best Book of the Month and won a 2015 SCBWI Crystal Kite Award. The Stars of Summer followed in 2015, and Stars so Sweet (7/19/16) completes the series. Tara grew up in New York and holds a B.A. in Creative Writing from Dartmouth College. After surviving the world's longest honeymoon (two years, seventy-four countries!), she now lives in Colorado with her family.

Visit the other blog tour stops here:
The Daily Dahlia >> The Reading Date >> Bookish Illuminations >> Log Cabin Library >> Word Spelunking >> FWIW >> Fic Talk >> Pop Goes the Reader >> Kitchen Frolic >> Creative Spaces

Credits: Blog tour button / Kristin Rae; Book cover / Kelly Murphy

Disclaimer: An ARC of Stars So Sweet was sent to me from Putnam/Penguin for the blog tour.

Sunday, July 10, 2016

Graham Cracker Ice Cream

Our family friends gave us an ice cream machine for our wedding and I knew it would be perfect for summer this year. So far we've been having a fantastically hot summer, weather made for ice cream. Not to mention, July is ice cream month too! It was time to take out the machine and give it a churn (plus now Howard can't say I never use it).
I had lots of graham cracker crumbs left from the key lime pie, so what better use than to infuse the flavour into ice cream? I happen to have a lot of ice cream books, but based on word of mouth alone, I knew the first one I would crack open would be Jeni's. I was lucky enough to get a copy two years ago at a trade show and I think I'm going to have to get her first book as well - Jeni's Splendid Ice Creams at Home.

I have a Cuisinart Ice Cream Maker, it looks something like this. It's quite easy to use, just give it a good clean and dry. Then pop the bowl in the freezer over night. The bowl is ready to use when you don't hear the liquid inside the walls sloshing around.
Graham Cracker Ice Cream
Recipe from Jeni's Splendid Ice Cream Desserts
(Makes about 1 quart)

2 2/3 cups of whole milk
1 tablespoon + 2 teaspoons of cornstarch
4 tablespoons of cream cheese softened
1/8 teaspoon of fine sea salt
1 1/2 cups of heavy cream
3/4 cup of granulated sugar
1/4 cup of light corn syrup
1/2 cup of graham cracker crumbs
  1. Don't forget to freeze your ice cream maker's bowl in the freezer the day before!
  2. Take out two mixing bowls. In the first one, mix 2 tablespoons of the milk with the cornstarch. In the second bowl, whisk the cream cheese and salt together.
  3. Combine the remaining milk, heavy cream, sugar, and corn syrup in a saucepan and bring to a boil over medium-high heat. Boil for 4 minutes and remove the sauce pan from the heat and gradually whisk in the first bowl with the milk and cornstarch. Place it back on the heat and bring it back to a boil over medium-high heat. It'll start to feel a little thicker in about a minute. Remove from the heat.
  4. Next, slowly add in the second bowl of cream cheese and salt. Whisk until smooth. Add the graham cracker crumbs and allow the mixture to steep for 3 minutes. 
  5. In a basin or large bowl or pot, fill it with ice and water.
  6. With a sieve, pour your mixture through it and into a large Ziplock bag. Seal and submerge into the ice bath in your basin, bowl, or pot. If you don't have a 1-gallon Ziplock bag, I was able to do this with a container with a airtight lid. Let the mixture cool down for  approximately 30 minutes, add more ice if necessary. I popped mine in the fridge to speed up the process.
  7. Take out your frozen bowl and assemble it in your ice cream maker. Pour the ice cream mixture in and start the machine! Churn for 25 minutes.
  8. Don't worry, an ice cream expert told me that it'll still look soupy after, she told me "the ice cream machine is really just aerating it a bit and dropping its temperature." Using a spatula, pour out the creamy mixture into your storage container, press a sheet of parchment on top of the surface, and seal with an airtight lid. Freeze for at least 4 hours or until it's firm.
I have to say the consistency and texture of the ice cream was top notch. Yes, just like store bought! Let us all bow down to the ice cream queen Jeni!
It's tempting to also buy another ice cream bowl so that I'll have two canisters at the ready for different flavours. Wouldn't it be great to have a homemade ice cream party this summer?
Mmm graham cracker ice cream - may I suggest dressing it up with mini marshmallows and chocolate syrup?

Sunday, July 3, 2016

Key Lime Pie

How is everyone's long weekend going? I am really loving the hot weather that Toronto is experiencing. I can't remember a more glorious summer than the one we're currently having. With above 25°C temperature, I can finally ditch the jackets and dig out the dresses and skirts! It's like seeing good old friends again when I take out my underused shorts and T-shirts. It also makes me feel a lot more body conscious, but then I remember not to care so much and gobble down another piece of pie.
This pie is an homage a publicity intern at work. Hey, I've been there and done that - it's not an easy gig. But despite all the work we have to work together to finish, our publicity intern found the time to make key lime pie (not once, but twice) for us. I have the vantage point of sitting near our kitchen and got to hear a lot of joyful food noises that my colleagues were making upon taking a bite. So Anyka, this is for you!
Key Lime Pie
(Makes one 9-inch pie)
Recipe from Perfect Pies by Michele Stuart

Crust
1 1/2 cup of graham crackers, finely chopped
1 tablespoon of granulated sugar
5 tablespoons of unsalted butter, melted
  1. Preheat your oven to 350°F.
  2. In a bowl, mix the graham cracker crumbs, sugar, and melted butter together. If you have cracker sheets, you can use also place all three ingredients in a food processor to chop and mix. Or you can purchase the graham crackers already chopped, I've tried both methods and they work fine (see photos above).
  3. Spread the mixture evenly across the bottom and sides of your pie tin. Try using something with a flat bottom that you can use to press the crust firmly down. I use a measuring cup (see photo below).
  4. Bake the crust for 5 minutes and cool the pie shell for half an hour before adding the filling.
Filling
6 large egg yolks
3 teaspoons of key lime zest
2 fourteen-ounce cans of condensed milk
1 cup of key lime juice
  1. Keep your oven on at 350°F.
  2. Using an electric mixer fitted with the beater blade, beat the egg yolks, lime zest, and condensed milk together. 
  3. Add in the lime juice and mix well until the filling is combined.
  4. Pour the filling into the graham cracker pie shell.
  5. Bake for 15 to 20 minutes until the pie is firm in the middle, but still soft. Allow the pie to cool and set. Cover and place the pie in the freezer for at least an hour before serving.
My pie tin is a bit shallow, so I had leftover filling. Not to waste it, I poured it into some dessert jars and popped those in a water bath for the oven. Same process as the pie, I had it cool and then covered to freeze it.
When it came time to eat it, I took it out to defrost for 5 minutes and added a layer of graham cracker crumbs on top.
Yummm!
Howard preferred the pie version, more graham crackers that's why. You know what? I agree!