WE'VE MOVED

Hello!

Thank you for the amazing 8 years here at A Baked Creation, we can't thank you enough for the memories! But we've decided to move over to a new site - Sincerely, Syl. Please join us there for future posts on all the things you loved here!

Sincerely,
Syl

Wednesday, October 24, 2012

My Hat Cupcakes

Do you wear hats?

I have to admit, I'm not a hat person. I don't own that many hats, just the necessary ones to keep me warm during the Toronto winters.

But I do like picture books about hats. And one of my favourite illustrators, Jon Klassen, wrote two: I Want My Hat Back and This is Not My Hat. He was visiting Toronto during his book tour and his Publicist wondered if I would make cupcakes for an office event.

YES!

So may I present, two sets, the first from I Want My Hat Back:
Turtle hasn't seen Bear's hat.

Frog hasn't seen Bear's hat.

Snake definitely hasn't seen Bear's hat.

Rabbit hasn't seen Bear's hat.

Fox hasn't seen Bear's hat.

Mole doesn't know what a hat is.

Poor Bear...

Good thing Deer showed up and talked some sense into Bear.

Rage! Someone was lying!

Look... Bear is sitting there innocently on a bunch of twigs and leaves.

“Excuse me, have you seen a rabbit wearing a hat?”
“No. Why are you asking me? I haven’t seen him. I haven’t seen any rabbits anywhere. I would not eat a rabbit. Don’t ask me anymore questions.”

Best ending ever.

Here's the set from Jon's second book, This Is Not My Hat:

Little Fish has taken off with Big Fish's hat.

Does Big Fish find out?
Who will rat out on Little Fish's whereabouts?

Little Fish is almost safe.

Uh-oh.

Looks like someone got their hat back.

I had so much fun story-boarding the cupcakes for this book! I even went overboard and planned 16 scenes before realizing I had to cut out 4. But it all worked out in the end.

I highly recommend reading the books if you can borrow them from your local library or buy them at your neighbourhood bookstore. I'm not just saying this because I work in book publishing!

Fun fact, no one took a cupcake to eat!

Jon Klassen and me! And his proud parents are behind us.

Thank you Jon! It was fantastic meeting you and I adore the new sketches in my books!

In case you're wondering, because I did ask, Jon's favourite dessert is Strawberry Rhubarb Pie!

Sunday, October 21, 2012

Maila's Dinosaur Cake and Cupcake Tower

We received an amazing e-mail this week from Maila, all the way from California. A sunny state we would love to visit one day. But back to the story, these kinds of e-mails make us so happy! We're grinning like the T-Rexes on the cupcakes above.

Maila wrote to tell us that she made a 6-inch cake and a 4-tiered cupcake tower for a friend's son who was turning three years old this year. The request was made on short notice, but instead of having a meltdown (hey, look, a volcano...), she spent a sleepless night working hard.

In those 24 hours, she must have looked up cake and buttercream recipes and found our fondant dinosaur tutorials.

She also wrote to tell us that this was her first time making a birthday cake and working with fondant. She had never worked with fondant before.

Yes, we were impressed. Your jaws probably just dropped too.

If it were our first baking project, we probably would not have pulled off such an amazing display of cupcakes.

Maila wrote to tell us that the T-Rexes on the grassy field also have a haven of water, it's blocked by the large "3" candle, but you can see the start of water there.

You know what we love? Party hats. These dinosaurs know how to rock the age. Lucky Cody.

Once again, thank you Maila for writing to us and sharing your photos. Then, for giving us permission to share your photos on our blog and facebook page. We are not surprised to hear that the party was a hit. Thank you for making so many people happy!

Photo credits: Maila

Friday, October 19, 2012

Crème Brûlée Tartlets

We had a lot of egg yolks leftover after making so many macarons. We managed to use most of them for the lemon curd, but we still had another batch of yolks! So we tried to make crème brûlée, we've never made it before despite all the ramekins we have. But then we saw a recipe for Crème Brûlée Tartlets and thought we would give it a try!

To make the tart shells, we're tried a pâte sucrée recipe.

Pâte Sucrée
Recipe from The Seasonal Baker

2 cups of all-purpose flour
2 sticks of unsalted butter
1/4 cup of sugar
1 teaspoon of salt
1 egg
1 egg yolk
  1. Using a stand mixer fitted with the paddle attachment, beat the butter, sugar, and salt on medium speed until light and fluffy, about 3 minutes.
  2. Add the egg and egg yolk, mix until combined with the flour.
  3. Shape the dough into a flattened disk and wrap in plastic. Refrigerate overnight.
Preheat your oven to 190°C (375°F). Take the dough out and sprinkle your work non-stick surface with flour. Not too much flour, you don't want to change the texture of the dough. Roll the dough out and fill your tart pans. Trim off any excess dough and roll it flat for the next pan. Prick the bottom of the tarts with a fork. Bake the shells for 15 minutes or until the crust is golden brown and crisp. Set aside.

Crème Brûlée
Recipe from Macarons

1 vanilla bean
1 cup of milk
1 cup of heavy cream
5 egg yolks
2/3 cup of granulated sugar
  1. Preheat your oven to 125°C (255°F).
  2. Split the vanilla bean in half lengthwise and scrape out the seeds.
  3. In a saucepan, pour in the milk and vanilla seeds. Heat over medium temperature.
  4. In a bowl, whisk the egg yolks and sugar until smooth.
  5. When the milk begins to boil (watch it carefully, it can boil over), remove it from the heat and stir in the heavy cream. Pour in the yolks and whisk quickly to prevent the heat from cooking scrambled eggs!
  6. Pour the mixture through a sieve. 
To our surprise, the pâte sucrée tart shells shrunk in the oven! They no longer had the height of the tart pans, which created a really shallow area for the crème brûlée. Some of the tarts could only hold a spoonful of filling. Well, we bake and we learn. Take out some ramekins for your extra custard!

Carefully ladle the custard into the tart shells and pop them back in the oven. Bake for another 15 minutes or until the custard sets. It will jiggle a little bit, but be careful not to over bake it, the custard will curdle! Remove the tarts from the oven and let cool. Refrigerate for an hour or overnight.

To create the signature crust over the crème brûlée, take some granulated sugar and sprinkle the surface. Make sure to do this when you take the tarts out from the fridge. You'll want them still cool, otherwise your kitchen torch will melt the crust.

Ignite your kitchen torch and move the flame evenly over the top of the tarts. Avoid the crust and stop when the sugar is caramelized. Serve immediately.

Oops, you can see that we burnt a bit of the crust and how shallow the tarts were! Next time, we're going to roll them thinner and let some of the dough hang over the tart pans.

Thursday, October 18, 2012

Lemon Macarons

We made lemon macarons! But, wait, here's the full story. When we were contacted by a representative of Cuisinart Canada about trying some of their products, we said sure! And this was our special delivery:

What is it? The 12-cup Cuisinart Elite Collection Food Processor. When I told my dad about it, he was so excited. It turns out he was looking for a new food processor. So I told him he could borrow it after I tested it out. But still, it was funny to hear him exclaim "1000-Watt! I want one with a 1000-Watt." I guess the more power the motor has, the better it is!

I unpacked everything and the first step in the instruction booklet was to clean it. Will do! After the initial clean up, I assembled the food processor and took out a bag of almonds. Instead of buying almond flour, we are making our own now.

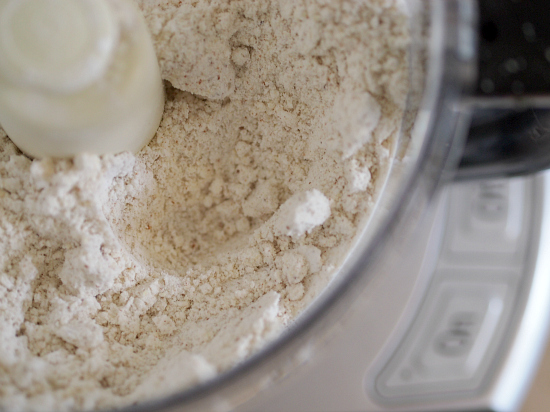
We poured the almonds in the food processor along with the powdered sugar.

Crossed our fingers and pressed the ON button.

Well, would you look at that! Nicely done!

Sifting it was so much easier than the almond flour we previously used because the almond flour still had larger chunks that needed to be broken down.

The only thing to improve on next time is to remove the almond skin so that we don't have brown specks in our macaron shells. But, at least you know we're using real almonds! Do places sell skinless almonds? That sounds weird.

We might have gone overboard... but we really wanted to take advantage of the food processor while we had it. Fifty macarons aren't that much. We're positive that we'll find eaters.

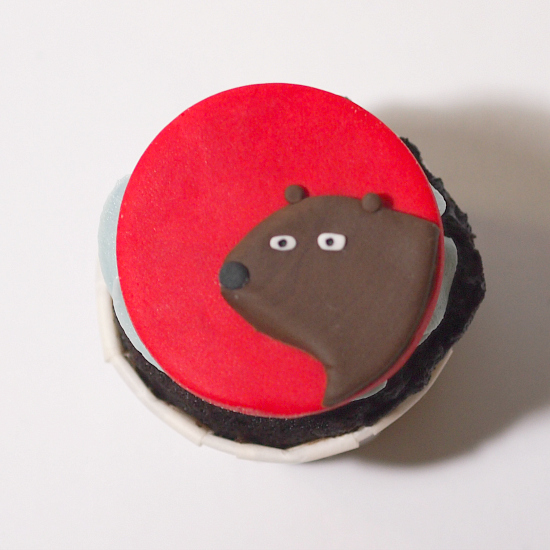
Our macaron tops are smoother and flatter this time. Improving each time we make them!

We filled the macarons with lemon curd icing this time! Mmm, so zesty and delicious!

Lemon Curd Icing
(Makes enough to fill 50-60 macarons)

6 egg yolks
1 cup sugar
Fresh lemon juice from 1 large lemon (about 1/3 cup)
Grated zest from 1 large lemon
1 stick of cold unsalted butter, cut into slices
2 cups of powdered sugar
  1. Set up a double boiler. Add about 1-inch of water to a saucepan or pot and bring the water to a simmer. In a metal bowl that will fit over the saucepan, whisk the egg yolks and sugar until smooth.
  2. Whisk in the lemon juice and zest until combined.
  3. Place the metal bowl on top of the saucepan and stir with a rubber spatula. The mixture will begin to thicken in about 10 minutes.
  4. Turn the heat off and whisk in the sliced butter. Wait for the slice to completely melt before adding the next one.
  5. Pour the lemon curd into a glass jar or container and allow it to cool. Refrigerate over night.
  6. To make the icing, add in a cup of powdered sugar to thicken. Add in more if you need a thicker consistency. Scoop into a piping bag.
We've grown quite attached to the food processor in this short time. Never realized how convenient it was to have it do all the mixing that our stand mixer can't do. Think pie and tart shells!

We'll be sad to return the food processor, but thank you Cuisinart for letting us borrow it and thank you to Margaret for all the arrangements.

Disclaimer: A publicity representative for Cuisinart Canada contacted us about their reviewing their products. The 12-cup Cuisinart Elite Collection Food Processor was sent to us for review. The product is on loan and will be returned to Cuisinart. No incentives were used to produce a positive review. No monetary exchange took place. All opinions are our own.