Well, since my Totoro puffs didn't turn out the way I imagined them to, I thought I would work on some éclairs instead. The good thing is, the choux dough recipe is the same (so refer back to the Totoro post), the only thing you do differently is how you pipe them out.
And you know what? You're supposed to use a star tip, but I couldn't find mine. It's probably at my parent's house - all my baking supplies are now split apart because my condo can't fit everything. But the éclairs turned out just fine with a round piping tip.
After the éclairs cool, cut them in half so that you have your elongated boats. If you made the choux dough correctly, the interiors should be semi-hollow.
It's strawberry season again (yay) so I chopped them up into tiny little cubes. Then sprinkled a teaspoon of sugar on it, gave it a toss, and had it macerate for a bit. It's sitting in a sieve so that any excess liquids can drain off.
Using tiny dessert spoons, I filled the with the strawberries I so painstakingly sliced.
Then came the fun part, decorating with matcha buttercream! I was originally going to make matcha pastry cream, but realized I finished using all the milk on the choux dough. Oops! Oh well, it worked out in the end as buttercream is so much easier to make and also pipes out beautifully.
Doesn't the smooth matcha buttercream look like avocado? In fact, these éclairs remind me of sub sandwiches or avocado toast. I know you're supposed to put the tops back on the éclairs . . . but they're so much prettier when they're like an open-faced sandwich!
You can also pipe the buttercream in first and then top it with strawberries. Don't forget to decorate! I had sprinkles and milk chocolate crispearls on hand. You can also switch out your piping tip for different designs.
Howard's colleagues are going to have a happy Monday eating these (I hope)! There's too many for Howard and I to finish. There's also a key lime pie in the freezer, but more about that later.
WE'VE MOVED
Hello!
Thank you for the amazing 8 years here at A Baked Creation, we can't thank you enough for the memories! But we've decided to move over to a new site - Sincerely, Syl. Please join us there for future posts on all the things you loved here!
Sincerely,
Syl
Showing posts with label icing. Show all posts
Sunday, June 26, 2016
Monday, August 5, 2013
Peach Cinny Buns
Good afternoon friends! I hope you're enjoying the Civic holiday long weekend, I always feel extra lucky when I can sleep in on a Monday and make breakfast.
We've been spoiling ourselves with the lovely peaches that have come in. Last night, we grilled some with pound cake and served it with ice cream. A simple but flavourful dessert, not to mention, easy to assemble. This morning, we chopped some up to lay over a spread of cinnamon paste and then wrapped it in a soft and chewy dough.
Peach Cinny Buns
Makes 24 cinny buns
1 1/3 cups of unsalted butter at room temperature
1 1/4 cups of milk
1/3 cup of granulated sugar
3/4 teaspoon of salt
6 cups of all-purpose flour
1 tablespoon of active dry yeast
3 large eggs at room temperature
1 1/2 cups of dark brown sugar
2 tablespoons of cinnamon
Chopped peaches from 3 peaches
If like me, you only have one stand mixer, you're going to need that bowl clean. Fit the mixer with the paddle attachment and cream the remaining 1 cup of unsalted butter and dark brown sugar on medium until it's light and fluffy. Add the cinnamon and the remaining 1/2 cup of flour and mix on low until it becomes a soft paste.
Once the dough has risen, remove the plastic wrap and give the dough a few punches. Go ahead. Don't be afraid to show to the dough who's boss. Take it out onto your work area and knead it down. If you have limited table-top space like yours truly, divide the dough in half. Use a rolling pin to flatten it into a large rectangle about 1-1.5 cm thick.
Using a knife or spatula, spread the cinnamon paste on top of the dough. Go right up to the edges and even out the layer. Top it up with some diced peaches.
Then, take a deep breathe, put on a brave face, and roll the dough. I found it easier to roll away from myself. Pinch the openings so that you seal everything inside. Try to flatten it too so that it doesn't taper out into a point.
Take a sharp knife and cut the dough into equal rounds about 4 cm thick.
Place them in a deep baking pan as shown above. Preheat your oven to 175°C (350°F). Then bake the cinny buns for 20-25 minutes.
Remove from the oven and allow the cinny buns to cool. Take them out of the pan after 10-15 minutes and serve warm.
Now that's a glorious morning. But you can make it even better!
Taking some icing sugar and mix it with milk (or water or heavy cream) until you get a nice runny glaze.
Proceed to pour it over your peach cinny bun. Only share the icing if you have to. Enjoy!
We've been spoiling ourselves with the lovely peaches that have come in. Last night, we grilled some with pound cake and served it with ice cream. A simple but flavourful dessert, not to mention, easy to assemble. This morning, we chopped some up to lay over a spread of cinnamon paste and then wrapped it in a soft and chewy dough.
Peach Cinny Buns
Makes 24 cinny buns
1 1/3 cups of unsalted butter at room temperature
1 1/4 cups of milk
1/3 cup of granulated sugar
3/4 teaspoon of salt
6 cups of all-purpose flour
1 tablespoon of active dry yeast
3 large eggs at room temperature
1 1/2 cups of dark brown sugar
2 tablespoons of cinnamon
Chopped peaches from 3 peaches
- In a saucepan, add 1/3 cup of unsalted butter, milk, granulated sugar, and salt over medium heat. Stir until the butter has completely melted. The mixture shouldn't reach a boil or bubbling.
- Using a stand mixer with a dough hook, add in 5 1/2 cups of flour and the yeast. Give it a quick and short mix so that it's all incorporated. Then add the warm mixture from the saucepan in. Mix on low until the dough starts to form.
- Add the eggs and mix on low until the dough is smooth.
- Place the dough in a bowl and cover it with plastic wrap. Set the bowl aside in a warm spot in your kitchen. Allow the dough to rise - about an hour.
If like me, you only have one stand mixer, you're going to need that bowl clean. Fit the mixer with the paddle attachment and cream the remaining 1 cup of unsalted butter and dark brown sugar on medium until it's light and fluffy. Add the cinnamon and the remaining 1/2 cup of flour and mix on low until it becomes a soft paste.
Once the dough has risen, remove the plastic wrap and give the dough a few punches. Go ahead. Don't be afraid to show to the dough who's boss. Take it out onto your work area and knead it down. If you have limited table-top space like yours truly, divide the dough in half. Use a rolling pin to flatten it into a large rectangle about 1-1.5 cm thick.
Using a knife or spatula, spread the cinnamon paste on top of the dough. Go right up to the edges and even out the layer. Top it up with some diced peaches.
Then, take a deep breathe, put on a brave face, and roll the dough. I found it easier to roll away from myself. Pinch the openings so that you seal everything inside. Try to flatten it too so that it doesn't taper out into a point.
Take a sharp knife and cut the dough into equal rounds about 4 cm thick.
Place them in a deep baking pan as shown above. Preheat your oven to 175°C (350°F). Then bake the cinny buns for 20-25 minutes.
Remove from the oven and allow the cinny buns to cool. Take them out of the pan after 10-15 minutes and serve warm.
Now that's a glorious morning. But you can make it even better!
Taking some icing sugar and mix it with milk (or water or heavy cream) until you get a nice runny glaze.
Proceed to pour it over your peach cinny bun. Only share the icing if you have to. Enjoy!
Sunday, December 30, 2012
Matcha Macarons
I made these matcha macarons for my dad today. He has to attend a holiday potluck party tomorrow and he asked me to make him macarons. He claims that with all these macarons I've made, he's only eaten three. Which is possible as I haven't had that many myself. I keep giving them away! In fact, I only got to snack on two of these matcha macarons. My mom stole one and my dad prevented my brother from taken any. I hope dad's party guests appreciate how much we refrained!
French Meringue Macarons
(Makes about 40-50 macarons)
2 3/4 cups of almond flour
2 3/4 cups of powdered sugar
3 tablespoons of matcha powder
1 cup of egg whites (from 6-7 eggs)
A pinch of salt
3/4 cups of granulated sugar
Festive sprinkles for decoration (optional)
(Makes enough to fill 40-50 macarons)
1/2 stick of unsalted butter, room temperature
1/2 stick of cream cheese
3 tablespoons of matcha powder
2 1/2 cups of powdered sugar
1 teaspoon of milk
Have a wonderful New Year's Eve tomorrow!
French Meringue Macarons
(Makes about 40-50 macarons)
2 3/4 cups of almond flour
2 3/4 cups of powdered sugar
3 tablespoons of matcha powder
1 cup of egg whites (from 6-7 eggs)
A pinch of salt
3/4 cups of granulated sugar
Festive sprinkles for decoration (optional)
- Line your baking trays with parchment paper.
- Separate your egg whites 2-3 days before baking. Cover and store them in the refrigerator. Two hours before you start making your macarons, take the egg whites out of the refrigerator, uncover them, and let them come to room temperature.
- Sift the almond flour, powdered sugar, and matcha powder together. If you have a food processor, put the ingredients in to create as fine as a texture as possible. This will help create smooth macaron shells.
- Using the whisk attachment on your mixer, whisk the egg whites with the salt. Pour the granulated sugar in three stages. Dumping it all in can deflate the egg whites, so you want to add a little bit at a time. When the egg whites reach stiff peaks, turn the mixer off.
- Fold the sifted almond mixture with the egg whites. You want to end up with a smooth batter that creates a ribbon when you lift it up from your spatula.
- When the batter is ready, fill your piping bag and pipe equal rounds on the parchment paper.
- Carefully tap your tray against the table or counter to eliminate air bubbles.
- After piping, add the sprinkles on top. Let the macarons rest in room temperature for 15-30 minutes.
- Preheat the oven to 300°F/150°C (325°F/160°C for a non-convection oven, although a convection oven is preferred for baking macarons).
- Bake your first tray of macarons for 14-15 minutes. After the first five minutes, open the oven doors to let out some of the steam.
- When the macarons are done, let them cool and then gently peel the macarons off the parchment paper.
After all the macarons have cooled, I usually pair them up and store them in a container while I prepare the filling:
Matcha Buttercream(Makes enough to fill 40-50 macarons)
1/2 stick of unsalted butter, room temperature
1/2 stick of cream cheese
3 tablespoons of matcha powder
2 1/2 cups of powdered sugar
1 teaspoon of milk
- Using a mixer, beat the butter and cream cheese together until smooth.
- Add in the matcha powder and powdered sugar. Mix until incorporated.
- If you find the consistency to be too stiff, add a teaspoon of milk and mix until the buttercream is smooth. Fill your piping bag and pipe out a dollop on the bottom of the macarons. Add the top of the macaron and gently sandwich the buttercream in between.
Have a wonderful New Year's Eve tomorrow!
Thursday, October 18, 2012
Lemon Macarons
We made lemon macarons! But, wait, here's the full story. When we were contacted by a representative of Cuisinart Canada about trying some of their products, we said sure! And this was our special delivery:
What is it? The 12-cup Cuisinart Elite Collection Food Processor. When I told my dad about it, he was so excited. It turns out he was looking for a new food processor. So I told him he could borrow it after I tested it out. But still, it was funny to hear him exclaim "1000-Watt! I want one with a 1000-Watt." I guess the more power the motor has, the better it is!
I unpacked everything and the first step in the instruction booklet was to clean it. Will do! After the initial clean up, I assembled the food processor and took out a bag of almonds. Instead of buying almond flour, we are making our own now.
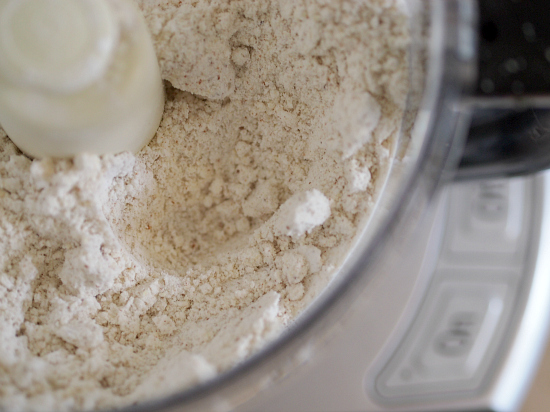
We poured the almonds in the food processor along with the powdered sugar.
Crossed our fingers and pressed the ON button.
Well, would you look at that! Nicely done!
Sifting it was so much easier than the almond flour we previously used because the almond flour still had larger chunks that needed to be broken down.
The only thing to improve on next time is to remove the almond skin so that we don't have brown specks in our macaron shells. But, at least you know we're using real almonds! Do places sell skinless almonds? That sounds weird.
We might have gone overboard... but we really wanted to take advantage of the food processor while we had it. Fifty macarons aren't that much. We're positive that we'll find eaters.
Our macaron tops are smoother and flatter this time. Improving each time we make them!
We filled the macarons with lemon curd icing this time! Mmm, so zesty and delicious!
Lemon Curd Icing
(Makes enough to fill 50-60 macarons)
6 egg yolks
1 cup sugar
Fresh lemon juice from 1 large lemon (about 1/3 cup)
Grated zest from 1 large lemon
1 stick of cold unsalted butter, cut into slices
2 cups of powdered sugar
We'll be sad to return the food processor, but thank you Cuisinart for letting us borrow it and thank you to Margaret for all the arrangements.
Disclaimer: A publicity representative for Cuisinart Canada contacted us about their reviewing their products. The 12-cup Cuisinart Elite Collection Food Processor was sent to us for review. The product is on loan and will be returned to Cuisinart. No incentives were used to produce a positive review. No monetary exchange took place. All opinions are our own.
What is it? The 12-cup Cuisinart Elite Collection Food Processor. When I told my dad about it, he was so excited. It turns out he was looking for a new food processor. So I told him he could borrow it after I tested it out. But still, it was funny to hear him exclaim "1000-Watt! I want one with a 1000-Watt." I guess the more power the motor has, the better it is!
I unpacked everything and the first step in the instruction booklet was to clean it. Will do! After the initial clean up, I assembled the food processor and took out a bag of almonds. Instead of buying almond flour, we are making our own now.
We poured the almonds in the food processor along with the powdered sugar.
Crossed our fingers and pressed the ON button.
Well, would you look at that! Nicely done!
Sifting it was so much easier than the almond flour we previously used because the almond flour still had larger chunks that needed to be broken down.
The only thing to improve on next time is to remove the almond skin so that we don't have brown specks in our macaron shells. But, at least you know we're using real almonds! Do places sell skinless almonds? That sounds weird.
We might have gone overboard... but we really wanted to take advantage of the food processor while we had it. Fifty macarons aren't that much. We're positive that we'll find eaters.
Our macaron tops are smoother and flatter this time. Improving each time we make them!
We filled the macarons with lemon curd icing this time! Mmm, so zesty and delicious!
Lemon Curd Icing
(Makes enough to fill 50-60 macarons)
6 egg yolks
1 cup sugar
Fresh lemon juice from 1 large lemon (about 1/3 cup)
Grated zest from 1 large lemon
1 stick of cold unsalted butter, cut into slices
2 cups of powdered sugar
- Set up a double boiler. Add about 1-inch of water to a saucepan or pot and bring the water to a simmer. In a metal bowl that will fit over the saucepan, whisk the egg yolks and sugar until smooth.
- Whisk in the lemon juice and zest until combined.
- Place the metal bowl on top of the saucepan and stir with a rubber spatula. The mixture will begin to thicken in about 10 minutes.
- Turn the heat off and whisk in the sliced butter. Wait for the slice to completely melt before adding the next one.
- Pour the lemon curd into a glass jar or container and allow it to cool. Refrigerate over night.
- To make the icing, add in a cup of powdered sugar to thicken. Add in more if you need a thicker consistency. Scoop into a piping bag.
We'll be sad to return the food processor, but thank you Cuisinart for letting us borrow it and thank you to Margaret for all the arrangements.
Disclaimer: A publicity representative for Cuisinart Canada contacted us about their reviewing their products. The 12-cup Cuisinart Elite Collection Food Processor was sent to us for review. The product is on loan and will be returned to Cuisinart. No incentives were used to produce a positive review. No monetary exchange took place. All opinions are our own.
Wednesday, February 1, 2012
Lemon Drizzle Loaf Cake
Well friends, it looks like we're already into February of 2012. I'm not going to go into a long description of how fast time is flying, but let me just say, damn! that was fast!
We are already looking forward to the next winter break. Or even a three-day weekend. I'm tired!
I hear that citrus is a great pick-me-up, so I made a lemon loaf on the weekend. This is probably the first time I've taken out the loaf pan for this blog! New year, new baked good shapes?
Lemon Drizzle Loaf Cake
Adapted from The Primrose Bakery Book
(Makes about 1 x 900g loaf cake, 8-10 slices)
155 grams of sifted all-purpose flour
1 teaspoon of baking powder
155 grams of granulated sugar
20 grams of cornstarch
155 grams of unsalted butter, at room temperature
3 large eggs
Grated zest and juice of 1 lemon
There were a few changes to the original recipe. The Primrose Bakery is in England and naturally their cookbook would have a few differences. You'll note that the measurements were all given in grams, which I actually liked. In my opinion, it helps give a more accurate recipe.
Back to the alterations I made. I didn't use self-raising flour, simply because I didn't have any and I figured the baking powder would help. In the end, I don't think it mattered because my loaf looked approximately the same height as the one in the cookbook.
I used granulated sugar instead of golden caster sugar, again because I didn't think I had any, but it turns out that I might actually have a jar! Cornflour was one of the ingredients listed, but after doing some research, it means cornstarch in the UK. I didn't think cornmeal would be used for a lemon loaf - but who knows?
Lastly, I changed the "drizzle" part of the recipe. This was a personal choice, I wanted smooth icing sugar, but I'm sure the texture of their icing makes the loaf more interesting.
Howard so kindly taste-tested a few slices for me. I think it was met with approval because he said, "Something finally worked out!" That was a poke to my first baking blunder of the year. Hmph!
But it was nice to hear that he enjoyed it. The cake was moist with a lemon flavour. I'd say go stronger, the zest and juice of one lemon isn't enough! Unless maybe if you had a giant lemon?
We are already looking forward to the next winter break. Or even a three-day weekend. I'm tired!
I hear that citrus is a great pick-me-up, so I made a lemon loaf on the weekend. This is probably the first time I've taken out the loaf pan for this blog! New year, new baked good shapes?
Lemon Drizzle Loaf Cake
Adapted from The Primrose Bakery Book
(Makes about 1 x 900g loaf cake, 8-10 slices)
155 grams of sifted all-purpose flour
1 teaspoon of baking powder
155 grams of granulated sugar
20 grams of cornstarch
155 grams of unsalted butter, at room temperature
3 large eggs
Grated zest and juice of 1 lemon
- Preheat the oven to 180 C. Grease your 1 x 900g loaf pan and line with parchment paper.
- Sift the flour, baking powder, sugar, and cornstarch together.
- Add in the butter, eggs, lemon zest, and lemon juice. Mix until evenly blended.
- Pour the batter into the loaf pan, smooth the top with a spatula.
- Bake in the centre of the oven for about 35-40 minutes, until golden brown and a cake tester inserted into the centre of the loaf comes out clean. Let the loaf cool.
- Make an icing drizzle. The book suggests 160g of granulated sugar and the juice of 2 lemons. I used icing sugar, vanilla extract, and water.
- Pour the drizzle over the loaf and allow it to set.
There were a few changes to the original recipe. The Primrose Bakery is in England and naturally their cookbook would have a few differences. You'll note that the measurements were all given in grams, which I actually liked. In my opinion, it helps give a more accurate recipe.
Back to the alterations I made. I didn't use self-raising flour, simply because I didn't have any and I figured the baking powder would help. In the end, I don't think it mattered because my loaf looked approximately the same height as the one in the cookbook.
I used granulated sugar instead of golden caster sugar, again because I didn't think I had any, but it turns out that I might actually have a jar! Cornflour was one of the ingredients listed, but after doing some research, it means cornstarch in the UK. I didn't think cornmeal would be used for a lemon loaf - but who knows?
Lastly, I changed the "drizzle" part of the recipe. This was a personal choice, I wanted smooth icing sugar, but I'm sure the texture of their icing makes the loaf more interesting.
Howard so kindly taste-tested a few slices for me. I think it was met with approval because he said, "Something finally worked out!" That was a poke to my first baking blunder of the year. Hmph!
But it was nice to hear that he enjoyed it. The cake was moist with a lemon flavour. I'd say go stronger, the zest and juice of one lemon isn't enough! Unless maybe if you had a giant lemon?
Saturday, May 14, 2011
Baked Mini Cake Doughnuts
I bought a new toy a couple of weeks ago. And by toy, I mean baking equipment. I needed to use my gift certificate, so it's shopping without really spending money. You know, the best kind of shopping. ;)
So here I was on a rainy Saturday afternoon looking at my new mini doughnut pan, wondering should I use it? Do I break off the packaging?
Vanilla Glaze
Yes, I think I will. There is also a recipe on the back of the packaging and look, I have all of the ingredients.
Baked Mini Cake Doughnuts
From Wilton.com
(Makes about 24 mini doughnuts)
1 1/4 cups of sifted cake flour
1/2 cup of granulated sugar
1 1/4 teaspoons of baking powder
1/8 teaspoon of ground nutmeg
3/4 teaspoon of salt
1/2 cup of buttermilk
1 egg
1 1/2 teaspoon of melted butter
- Preheat your oven to 218°C (425°F). Spray mini doughnut pan with nonstick cooking spray.
- In a large bowl, sift together cake flour, sugar, baking powder, nutmeg, and salt.
- Add in buttermilk, egg, and butter. Stir until combined.
- Fill each doughnut cup to half full (very important!).
- Bake 4-6 minutes or until the top of the doughnuts spring back when touched. Don't worry if the top of the doughnuts are not as golden brown as the bottom ones. (Colour is not an indication of doneness.)
- Let the doughnuts cool in the pan for 4-5 minutes before removing.
- Glaze or sugar your doughnuts.
Vanilla Glaze
1 cup of confectioners' sugar
1 tablespoon of milk
1/2 teaspoon of vanilla extract
- In a small bowl, stir together the sugar, milk, and vanilla extract until the sugar is completely dissolved.
- Use immediately to glaze doughnuts.
I dipped my doughnuts into the bowl, you can pipe or spoon the icing on. If you like, sprinkle your doughnuts right after you glaze them. I waited until the icing set a bit and then dipped it into a bowl of sprinkles.
So there you have it, my first experience in making baked doughnuts! The taste and texture of these were okay, but I would recommend seeking out other doughnut recipes. These didn't blow me away and were oddly chewy, but they are really cute and fun to make.
Monday, December 20, 2010
Orange Cupcakes with Vanilla Cream Icing
Hi! Around this time, Howard and I are flying over America, on our way to Las Vegas. I felt that I shouldn't go anywhere without leaving you some eye candy. So I made these cupcakes last Friday! We hope you love citrus as much as we do.
Orange Cupcakes with Vanilla Cream Icing
Recipe from Food & Drink (Spring 2010)
(Makes about 12-15 cupcakes)
Orange Cupcakes:
2 eggs
1/2 cup of unsalted butter
1 cup of granulated sugar
1/2 teaspoon of pure vanilla extract
2 cups of sifted cake and pastry flour
2 teaspoons of baking powder
1/4 teaspoon of salt
1/2 cup of milk
1/4 cup of orange juice
1 tablespoon orange zest
Recipe from Food & Drink (Spring 2010)
(Makes about 12-15 cupcakes)
Orange Cupcakes:
2 eggs
1/2 cup of unsalted butter
1 cup of granulated sugar
1/2 teaspoon of pure vanilla extract
2 cups of sifted cake and pastry flour
2 teaspoons of baking powder
1/4 teaspoon of salt
1/2 cup of milk
1/4 cup of orange juice
1 tablespoon orange zest
- Preheat the oven to 190°C (375°F) and have all ingredients at room temperature. Also have your cupcake liners and pans ready.
- If you forgot to take out the eggs to have them reach room temperature, place the eggs in a small bowl and cover with hot tap water.

- Beat butter with sugar until light and fluffy.
- Add in the eggs one at a time, then add the vanilla.
- Mix the flour with the baking powder and salt. Sift the dry ingredients again.
- Combine the milk with the orange juice.
- Pour half of the flour mixture into the butter mixture, then half of the milk mixture. Repeat. Mix well.
- Add in the zest to the batter and mix until combined.

- Use an ice cream scoop to evenly divide the batter among your cupcake liners.
- Bake in the oven for 20-25 minutes or until a cake tester comes out clean. Cool before frosting.
1/3 cup of cream cheese
2 tablespoon of unsalted butter
2 teaspoon of honey
3/4 teaspoon of pure vanilla extract
pinch of salt
2 cups of sifted icing sugar
2 tablespoon of unsalted butter
2 teaspoon of honey
3/4 teaspoon of pure vanilla extract
pinch of salt
2 cups of sifted icing sugar
- Beat the cream cheese, butter, honey, vanilla, and salt together.
- Gradually add the icing sugar until it is smooth and creamy. Add a tint of orange gel colour if you like.
- Spread or pipe on cooled cupcakes.
Piping fail! My intentions were to pipe beautiful flowers and be all zen in the afternoon. Instead of reaching a calming state, I became frustrated with my lack of practice. It just looked like piles of... oh I don't know! I can just imagine how disappointed my Wilton instructor would be! I later smoothed out all the icing with a spatula. Do you ever do that? =)
I really liked the icing, it was quite delicious! The orange cupcakes had a wonderful citrus aroma with each bite. I personally found the orange cupcakes a bit dense due to my lack of sifting, but my mom and Howard both said it was fine.
We wish you a happy holiday season! We'll be home for Christmas, so come back to read about our adventures in Nevada!
I really liked the icing, it was quite delicious! The orange cupcakes had a wonderful citrus aroma with each bite. I personally found the orange cupcakes a bit dense due to my lack of sifting, but my mom and Howard both said it was fine.
Subscribe to:
Posts (Atom)