Are you ready for this jelly? Have you ever wondered how jelly rolls were made? I did, I didn't believe you could roll a sheet of cake - surely it would break and be uncooperative. I thought they were machine made and sold in stores. So when I saw this recipe and the instructional photos, I knew I wanted to tackle it. So today, I'm sharing an excerpt from
What to Bake and How to Bake It with my own photos. I actually made this cake twice. You'll see why below!
Favorite Jelly Roll
Recipe from
What to Bake and How to Bake It by Jane Hornby
(Makes one jelly roll)
Preparation time: 15 minutes
Baking time: 10 minutes
Makes: 10 slices
A jelly roll was one of the first things I ever baked with my mom, probably because it was so quick to make, and all the ingredients were in the pantry. Although there are lots of steps, be assured that it’s a simple cake, and one of the most popular among friends and family when I was creating the recipes for this book.
INGREDIENTS
For the cake
½ stick (¼ cup) butter, plus extra for greasing
3 tbsp milk
4 eggs, room temperature
¾ cup sugar, preferably superfine
1 tbsp cornstarch
1 cup all-purpose flour
¼ tsp salt
For rolling and filling
¼ cup sugar
¾ cup raspberry jam or jelly
Use plenty of butter to grease the base and sides of a 10 x 15-inch jelly roll pan or rimmed baking sheet, then line the base with parchment paper. Preheat the oven to 400°F. Put the milk and butter in a small pan and heat gently until the butter melts. Set aside (it will need to be warm when you use it).
Put the eggs and the sugar in a large bowl and whisk with an electric mixer at medium speed until thick, moussey, and doubled in volume—about 5 minutes.
Stir the cornstarch, flour, and salt together, then sift them on top of the eggs. Fold together well using a large metal spoon or spatula, cutting and lifting the flour through the foam instead of stirring it. This will preserve the air bubbles and ensure a light and fluffy cake.
Pour the warm butter and milk around the edge of the batter bowl. Using the large spoon or spatula, fold until evenly combined. The liquid can pool at the bottom of the bowl, so be persistent, trying not to knock out too much air.
Carefully pour the batter into the prepared pan, then tilt it slowly from side to side, letting the batter run into the corners. If it still looks uneven, spread out the batter very gently with a spatula. Don’t worry if you see a little dry flour or ribbons of butter—just work them in gently. The batter will completely fill the pan, but don’t worry, it won’t spill over as it bakes.
Bake for 10 minutes, or until it is golden, has risen, and the edges have shrunk away from the sides of the pan. Meanwhile, dust a larger sheet of parchment paper with 2 tablespoons sugar. Loosen the edges of the cake with an icing spatula, then sprinkle the remaining sugar on top.
Swiftly flip the cake onto the sugared parchment paper. Carefully peel off the paper that lined the pan. Using a serrated knife, trim about ½ inch off from each edge. Score a line into the cake about 1 inch in from the short end nearest you. This will make it easier to roll.
While the cake is still hot, roll it up from the short end, rolling the sugared paper inside the cake. Don’t rush things, and if a few cracks appear, don’t worry.
Cover the cake in a clean dish towel and let cool until just warm.
Unwrap and unroll the cake, then spread it with the jam. Roll the cake up again, using one hand to guide it and the other to pull the sugared paper underneath it upwards. This will help keep the spiral fairly tight.
Place on a serving plate, seam-side down. It’s best eaten on the day it is made.
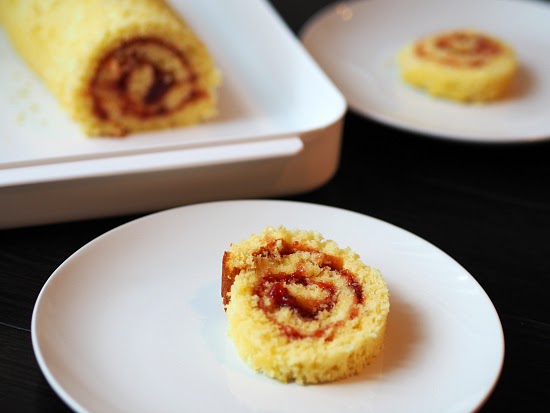
Sylvia: So as you can see, the first cake I made was too stiff and over baked. You don't want the base to be as brown as the one in the photo above. It did confirm my fears of cracks. But I attribute that to being slow on the roll. I was snapping photos and the cake cooled. The second time around, I wasted no time. I watched the cake in the last two minutes of baking. Took it out. Flipped it out of the pan and rolled it in the parchment paper. Success!
Look at that beauty! The cake was nice and fluffy and moist, allowing me to shape it without any fuss. I didn't even trim the sides this time, instead, I did it after the cake was fully assembled to get the nice straight edge. So those are my tips, don't over bake, work fast, and don't let the cake smell fear on you. You will then be rewarded with a delicious jelly roll.
Disclaimer: A review copy of
What to Bake and How to Bake It was sent to me for review from Becca Levenson at
Phaidon. Thank you! No incentives were used to produce a positive review of this book.


No comments:
Post a Comment