WE'VE MOVED

Hello!

Thank you for the amazing 8 years here at A Baked Creation, we can't thank you enough for the memories! But we've decided to move over to a new site - Sincerely, Syl. Please join us there for future posts on all the things you loved here!

Sincerely,
Syl
Showing posts with label Appetite. Show all posts

Tuesday, April 21, 2015

Basic, Great Chocolate Chip Cookies

There has been so many great new cookbook releases this spring, I can barely keep up! What's wonderful about these titles are the quality of material coming from Canadian authors: Sara Britton of My New Roots, Rosie Alyea of Sweetapolita, and Tara O'Brady of Seven Spoons. I meant to do a post for each book as they released, but the weekends just seem to fly by (why aren't weekends three days instead of two?).

But I had three beautiful bars of chocolate, the cookbook, and Tara's post to get me off my butt to make something. Plus, who can resist basic, great chocolate chip cookies?
Look how beautiful the tasting bars are! I've never used Valrhona chocolates before, but I've heard about their excellent reputation. Plus, they're always getting mentions in cookbooks where chefs repeat: use quality products. Really, I felt like Charlie from the Chocolate Factory when I ripped off the gold foil and saw the gorgeous design on these bars.
I felt like I was destroying art chopping up the chocolate bars. But at least they had a guideline of grids on it. You can chop them up a bit smaller, but I wanted to be able to taste each different chocolate piece in the cookie.
Do you like the sweet and salty combination? I found that the little sprinkle of sea salt on top was strong, so don't go overboard! Just put less than a pinch on top of the batter.

Basic, Great Chocolate Chip Cookies
Recipe adapted from Seven Spoons by Tara O'Brady
(Makes about 24 cookies)

1 cup of unsalted butter
3 1/4 cups of all-purpose flour
1 1/4 teaspoons of baking powder
1 teaspoon of baking soda
1 1/2 teaspoon of salt
1 1/2 cup of brown sugar
1/2 cup of granulated sugar
2 eggs
2 teaspoons of vanilla extract
210 grams of chopped chocolate (Tara calls for 340 grams of semisweet or bittersweet chocolate)
Flaky sea salt (optional)
  1. Preheat your oven to 360°F (180°C) - don't forget to check with an oven thermometer. Line two baking sheets with parchment paper.
  2. Place the butter in a saucepan and melt on the lowest setting. You want the butter to melt, but not sizzle and lose moisture.
  3. Take a chef knife and chop up your chocolate. I used three 70 gram bars of 32% cacao, 46% cacao, and 72% cacao. I combined all three together so that the cookies would get a mix of blond, milk, and dark chocolate bits in it.
  4. In a bowl, whisk the flour, baking powder, baking soda, and salt.
  5. Using a stand mixer, pour in both sugars and the melted butter. Whisk until combined. Add in the eggs one at a time. Pour in the vanilla extract. Once it's blended, switch the whisk attachment to the paddle or use a spatula.
  6. Carefully add in the dry ingredients and mix a little bit (doesn't have to be well blended at this point).
  7. Add in the chopped chocolate and fold into the batter until well combined. The less mixing you do when the dry ingredients are added, the better. You don't want the batter to become too doughy and smooth.
  8. At this stage, you can refrigerate the batter. I did for 5 minutes because the batter was looking a bit shiny and it is mentioned in Tara's notes - thanks for troubleshooting!
  9. Scoop out about 3 tablespoons of batter and form it into a ball. Place on parchment paper and space each one 3 inches apart. Optional, sprinkle the top with flaky sea salt. I did for 12 and left the other 12 as is.
  10. Bake for 10 to 12 minutes. When you take them out, let them rest for 2 minutes before transferring to a wire rack to cool.
I love how quickly the cookie batter came together, there's no need to chill the dough for hours or overnight. All about the immediate gratification here.
Unbelievable. Just because I'm standing on a chair taking cookie photos, it doesn't mean someone should swoop in and grab one. Luckily, I caught the thief red-handed in the photo and was able to confront them later.
Oh these cookies are good. They're soft and chewy on the inside. And yes, they're cookies worth dreaming about and craving for. They would make a great base for nutty cookies too (walnuts or pecans anyone?).
Happy publication day Tara!

Tuesday, March 10, 2015

Good Food, Good Life

130 Simple Recipes You'll Love to Make and Eat
Written by Curtis Stone
Photographs by Ray Kachatorian
ISBN 13: 9780449015896
ISBN 10: 0449015890
Hardcover: 304 pages

Sooooo, there's a new Curtis Stone cookbook! I always get excited when I see that there's a new book coming out from him. Usually I find out at sales conference from work and then have to wait an entire year. He once came in to meet with the marketing and publicity department at work and I tried to nonchalantly walk by the boardroom to see if I could spot him or even better - meet him! But no luck, maybe this year!
I'm noticing this trend among a lot of the cookbooks this year, no jacket! And matte interior paper and matte covers with spine wraps. Neutral colours.

Is everyone tired of the glossy and shiny look? I understand that jackets are cumbersome in the kitchen, but they do help protect the book when you accidentally place the book on a wet counter top. Just be extra careful now, you don't want to drop or spill anything by accident to blur out the recipes. But I don't mind this new direction, I'm digging the look. Most cookbooks today are trying to capture a lifestyle compared to the bright and showy cooking shows on television.
Good Food, Good Life is about family and home cooked meals that are humble but tasty. The dedication is made out to Curtis's son, Hudson and the introduction mentions Emerson, the latest addition to his family. You can even make the wedding cupcakes that he made when he married Lindsay Price in the book too. Yes, you can win a girl's heart with food! You can also see that his focus and stories are on raising a family with good food.
Here's a glance at how the cookbook is divided. I mostly tagged recipes for dinner and breakfast. As you can see, I've tagged a lot of them to try. For me, they are mostly weekend recipes because it still takes me awhile to assemble everything, so it's not going to work on a busy weekday for me. I also found that a lot of the recipes I did want to try required firing up a grill, so I had to skip tagging them. A skillet on the stove top might work, but I don't like smoking up my apartment (my exhaust fan in the microwave sucks) and I don't think we're allowed to grill on the balcony. Which is a shame, but maybe I'll take these grill recipes over to my parent's house or borrow a friend's backyard.
Each recipe clearly labels the serving, prep time, cook time, and make-ahead suggestions. I don't know about you, but the prep times are never accurate for me! I'm so slow at getting everything in place before I cook. But I appreciate them just the same, it gives me an estimate (I double it) and I like knowing the cook times so I know when to get up from the couch (stop binge-watching) to make dinner.
If you're someone who fears a long ingredient list like me, I would say that the average would be ten in this cookbook. There are the simpler recipes that use five or less ingredients and then the ambitious projects that list fifteen and over. It really depends on your mood and time.
I wanted to let you a look at a few interior spreads. Most of the recipes include a photograph of the finished products. Others show the ingredients or a picture of Curtis and Hudson prepping and cooking in the kitchen.
The layout is clean and easy to read and the instructions are clear to follow. The photographs look so laid back (even though they're styled) and simple, making the food stand out and really showing you that you can do it, you too can make this dish look good at home. (Why don't my food photos ever look like that?)
Here's Lindsay's Lemonade! I made Lindsay's Guacamole from What's for Dinner? and it's delicious, so I'm expecting the same for this drink.
I have to admit that I prefer What's for Dinner? over Good Food, Good Life a tiny bit, but please keep in mind that the concepts are different between those two cookbooks. I'll be sharing my cooking experience with a few recipes following this post, so return to see how the food turn outs!

And if you ever need a helping hand (sous chef) in the kitchen, you can now get your very own Pocket Curtis! Happy cooking!

Friday, October 18, 2013

Butter Baked Goods

Today is Chocolate Cupcake Day. Yes, it's a thing. Chocolate cupcakes are our favourite, they're easy to make, stay moist, and you can pair it with almost any flavours and it still tastes great. Or, you can add a hint of salt with it if you want to cut the sweetness. Basically, we find that chocolate is versatile (we're sure others agree)! To help us celebrate this national holiday, we enlisted the help of Butter Baked Goods.

Butter Baked Goods
Nostalgic Recipes From a Little Neighborhood Bakery
Written by Rosie Daykin
Photographs by Janis Nicolay
ISBN 13: 9780449015834
ISBN 10: 0449015831
Publisher: Appetite by Random House
Hardcover: 272 pages

Butter is a bakery in Vancouver, opened by Rosie Daykin (an interior designer), in 2007. Her vision was to restore the nostalgia of homemade baked goods. We think she succeeded from viewing photos of the bakery online and flipping through her cookbook. Pastel pinks, greens, and blues, Butter Baked Goods is like a chic grandmother. The cover alone gives me cake stand envy. That rose wallpaper you see in the background? Endpapers. And there's a soft green ribbon that serves as a bookmark, which I know that they use to tie up their treats with.
There's nine chapters of treats: muffins, scones, cinny buns and loaves; drop and sandwich cookies; rolled and cut cookies; bars and slices; butter creams and frostings; cakes; cupcakes and whoopie pies; pastry, pies and tarts; and confections. The recipes go by measuring cups and spoons, so the only thing I would wish for would be the weight measurements beside the ingredient list.
Recipes I'll want to try: Pineapple Coconut Scones; Apple Bacon Cheddar Scones; Banana Chocolate Loaf; The Gingerstamp; Smartie Pants Bar; The Campfire Bar (makes me want to go out and purchase a better kitchen blowtorch); Butterscotch Crispy Bar; Triple Lemon Layer Cake; The Quintessential Butter Tart; and Butter's Famous Marshmallows.
I also want to give a nod to Janis Nicolay and Kelly Hill. The photographs are lovely, delicious looking and the layout and design is beautiful and thoughtful. There's a photo for every recipe and even some for process and procedures. Overall, this would be a great gift for those starting out in the baking world.

So I made some chocolate and peanut butter cupcakes, only making slight changes here and there to make due with what I had in the kitchen. They might look different from the version in the cookbook, but we can attest to how yummy the cupcake itself is!
Chocolate Peanut Butter Crunch Cupcakes
Recipe adapted from Butter Baked Goods
(Makes about 28-30 cupcakes)

2 1/2 cups of all-purpose flour
1 1/4 cup of cocoa powder
1 1/2 teaspoon of baking soda
1/2 teaspoon of salt
1/2 cup of smooth peanut butter (plus 1/2 cup more if you include the optional step)
1/2 cup of unsalted butter, room temperature
1 cup of granulated sugar
1 cup of dark brown sugar
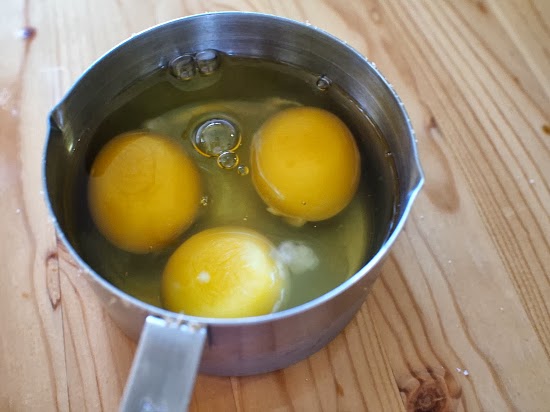
3 large eggs
1 1/2 cup of whole milk
1 cup of sour cream
2 teaspoons of vanilla extract
  1. Preheat your oven to 175°C (350°F) and prepare your cupcake pans by placing the cupcake liners in.
  2. Sift the flour, cocoa powder, baking soda, and salt into a large bowl (preferably one with a spout).
  3. Using a stand mixer with the paddle attachment, cream the peanut butter, unsalted butter, granulated sugar, and brown sugar on medium to high speed until light and fluffy.
  4. Add the eggs one at a time, mixing well after each one. Scrape the sides of the bowls as needed.
  5. In a measuring cup, whisk the milk, sour cream, and vanilla extract together.
  6. Turn the mixer to low and alternate adding the dry ingredients and the liquid ingredients. Begin and end with the dry ingredients in three parts, the liquid ingredients in two parts.
  7. Using an ice cream scoop, fill each cupcake liner about three-quarters full. This part is optional (I skipped it), use a small teaspoon to push in 1 teaspoon of peanut butter into the center of the batter. Make sure it is fully covered by the cupcake batter.
  8. Bake for 20-25 minutes or until a cake tester inserted, comes out clean. If you included the optional step, don't insert your tester into the middle, do it on the side. Otherwise, you'll just hit warm, gooey peanut butter.
  9. Remove the cupcakes from the oven and allow it to cool in the pan for 10 minutes before transferring them to a wire rack.
The following recipes are not in Butter Baked Goods, but an improvised version since the original called for a peanut butter butter cream and a deep dark chocolate butter cream. I didn't feel like doing a double stacked swirl of frosting on the cupcakes.

Chocolate Peanut Butter Frosting
(Makes enough to frost 18-20 cupcakes)

1 stick of unsalted butter, at room temperature
2 cups of icing sugar
1/4 cup of smooth peanut butter
5 (approximately 1/4 cup) Lindor Peanut Butter Milk Chocolate Truffles, melted
1 1/2 tablespoons of whole milk
  1. Using a stand mixer with the paddle attachment, cream the butter, icing sugar, and peanut butter together.
  2. Melt the chocolate and peanut butter truffles over a double boiler or in the microwave at 10-15 second intervals. Pour into frosting and mix.
  3. Add in the milk for a smoother consistency.
Chocolate Ganache
1/4 cup of semi-sweet chocolate
1 tablespoon of whole milk
  1. Melt the chocolate over a double boiler or in the microwave at 10-15 second intervals. Stir until smooth.
  2. Add in the milk and mix until incorporated.
Crunch
1/2 cup of Rice Krispies

Final steps to assemble the cupcakes. Pipe the chocolate peanut butter frosting onto the cupcake, swirls look best! Then, create the chocolate ganache as you want to work quickly with it so that it doesn't cool and harden. Pipe zig-zags of chocolate ganache over the chocolate peanut butter frosting. Sprinkle Rice Krispies liberally over the frosting.
Eat! Howard's colleagues had the joy of eating some of our Chocolate Cupcake Day treats. I heard everyone from his department ate two and left only 10 for lucky passersby.

Sunday, November 18, 2012

Blogger Brunch with Smitten Kitchen

How many of you would wake up early on a Saturday morning and head into your office?
I'm guessing there's no show of hands.

But what if I told you that brunch would be served and you would get to meet Deb Perelman of Smitten Kitchen? And it wouldn't just be a meet-and-greet, you would get to have brunch with her, ask her any question, and have a copy of her cookbook signed? Yes, that early morning is starting to look enticing....

I was one of the lucky handful of bloggers invited to a brunch at Random House of Canada Limited. Even though I work there, I was sent an official invitation to attend as a blogger! Trust me, I was over the moon when I received it and quickly RSVPed with fan girl enthusiasm.

I had both my work and guest hats on. Before the day of the brunch, my colleague asked me to make some Smitten Kitchen items from the cookbook. We each called dibs on a recipe, made it, and brought it in for the brunch buffet.

This was truly a Smitten Kitchen brunch! And when you're with bloggers, you know that no one is touching the food until photos were taken.

Monique from the production department made these amazing Cheddar Swirl Breakfast Buns. Who doesn't like cheese? Who doesn't like swirl buns? As Deb writes on page 49 of The Smitten Kitchen Cookbook, these "are dangerous, dangerous buns."

I agree, they are highly addictive.

Mike from sales really outshone us all with Mom's Apple Cake (page 239 of the cookbook). The cake was delicious and I probably could have eaten a couple more slices.

Our incredible host and organize, Lindsey, of the online marketing department treated us with Big Cluster Maple Granola (page 26).

Poor Deb! I don't think she got many bites in during all the conversations: we learn which appliances are kept in her tiny kitchen - just four major ones: a food processor, a stand mixer, a blender, and an emulsion blender. It's all about priorities when there's limited space! She recounts that she did not like Brussel sprouts as a child, but has grown to love them now. However, she still doesn't eat fish! And her favourite brunch dishes were all the ones we made. ;)

After we had our fill of the food, Deb was busy signing copies of her book for us!

Deb and Syl! Yay!!!

I would be wrong not to thank my fellow colleagues who also took time out of their busy weekends for this event. Many thanks to Lindsey, Monique, Sheila, and Michael for planning, organizing, and hosting such a lovely brunch.

Are you wondering what I made for the blogger brunch? Brownie Roll-Out Cookies (page 210 of the cookbook)!

They are ridiculously easy to make. The dough is so pliable and easy to work with and great at holding their shape after you cut them.

It's no secret, but these make such good ice-cream sandwich cookies! So if you're looking to make your own at home, make these cookies! They're soft and chewy and are great milk-dunking cookies.
The best part was when Deb saw them, asked who made them, and was overjoyed that they were similar in shape to her's. Then she proceeded to snap a photo, which I captured. I'm such a dork.

Oh, one more thing. I don't know if you're interested, but I have a signed copy of The Smitten Kitchen Cookbook to give away. Interested in winning it?

Giveaway contest regulations and conditions:
  • The Smitten Kitchen Cookbook giveaway contest is open on Sunday, November 18, 2012 until Sunday, November 25, 2012. Entries submitted after 12 midnight EST on Sunday, November 25, 2012 will not be considered.
  • To enter, leave a comment below telling me which Smitten Kitchen recipe you would like to make.
  • A winner will be randomly chosen and announced here on A Baked Creation.
  • Please leave an e-mail address or twitter handle, in the case that you are the winner, we will be able to contact you.
  • This contest is available to residents of Canada and the U.S.A. only!
  • There will be one winner. The winner will be chosen in a random draw. The winner will receive a signed copy of The Smitten Kitchen Cookbook by Deb Perelman. If the winner does not respond with an adequate mailing address in a week, their prize is forfeited and a new winner will be chosen. Best of luck!
  • UPDATE: A winner has been chosen and contacted. Congratulations to Stephanie! Thank you to everyone who entered our giveaway!